![]()
Registering samples in PlutoF and PlutoF GO
The PlutoF Biodiversity Data Management Platform (Abarenkov et al., 2010) is an open access data management platform for biodiversity data including observations, specimens, material samples, sequences and related metadata.
PlutoF supports streamlined, automated submission of curated sample and occurrence data to major international repositories such as ENA (European Nucleotide Archive) and GBIF (Global Biodiversity Information Facility), helping to ensure that datasets are findable, accessible, interoperable and reusable (FAIR). PlutoF centralises data storage, enforces consistent data structures and vocabularies, facilitates collaboration among project partners, and reduces the risk of data loss or duplication compared to maintaining separate local spreadsheets or databases.
PlutoF GO is data collection tool for biodiversity data in a handy phone application that can be used to record samples during fieldwork, and upload them to the PlutoF platform.

PlutoF video tutorials available at: https://www.youtube.com/@PlutoFplatform/videos
Creating a project in PlutoF
Before using the PlutoF GO app, become a user in the PlutoF website.
Registering samples in PlutoF GO requires a Project ID. Generate one if needed in PlutoF (Main menu -> Projects -> New).
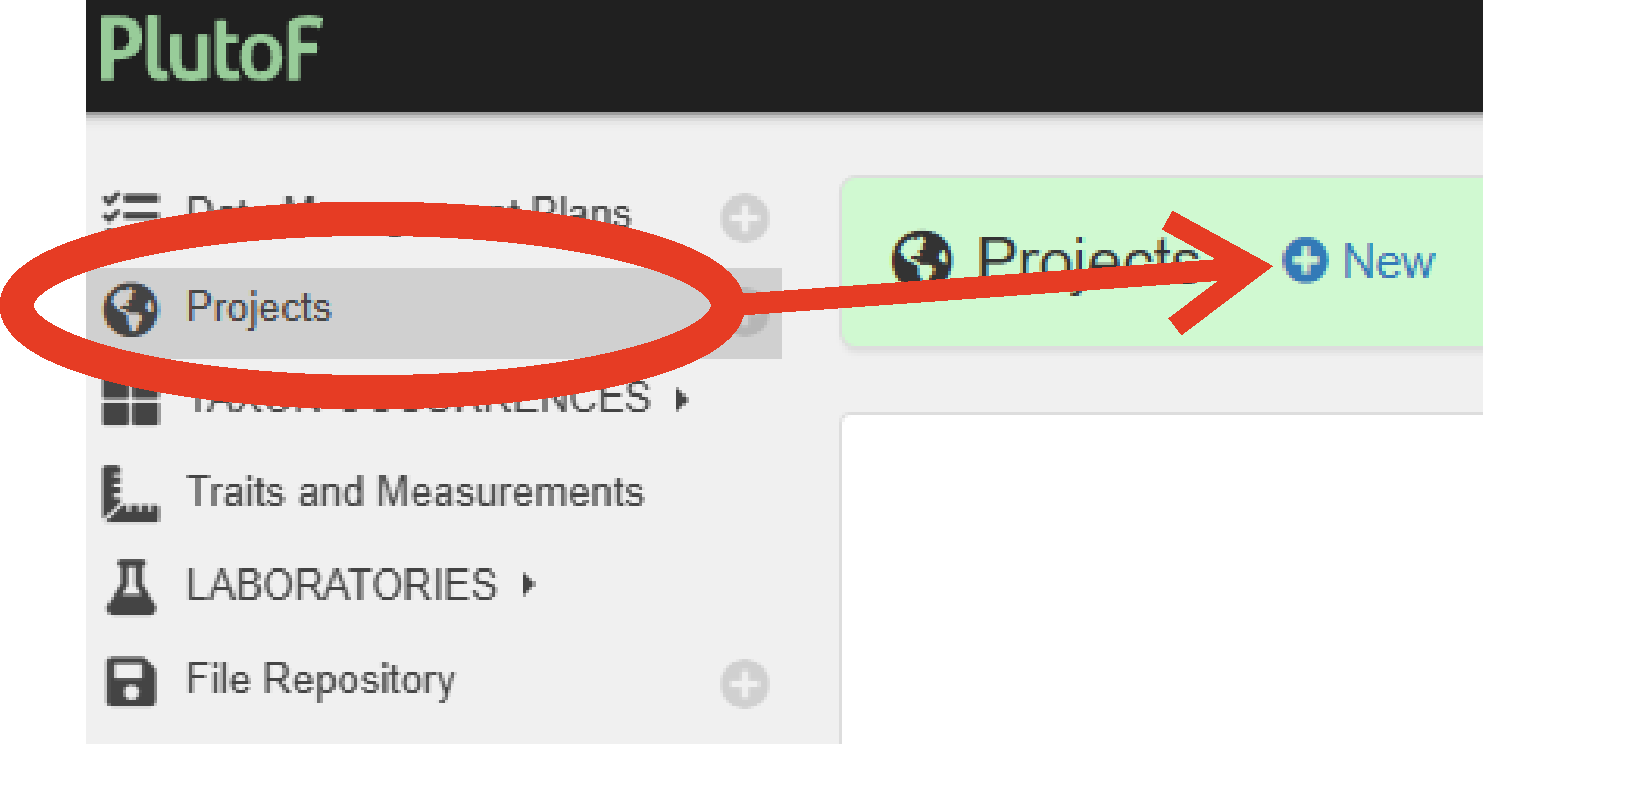
Projects allow to group and organise data for bulk data management, set up pre-defined sampling areas, manage user access rights and roles within a project, and prepare data for publishing. Projects can be public, private, or shared with collaborators.
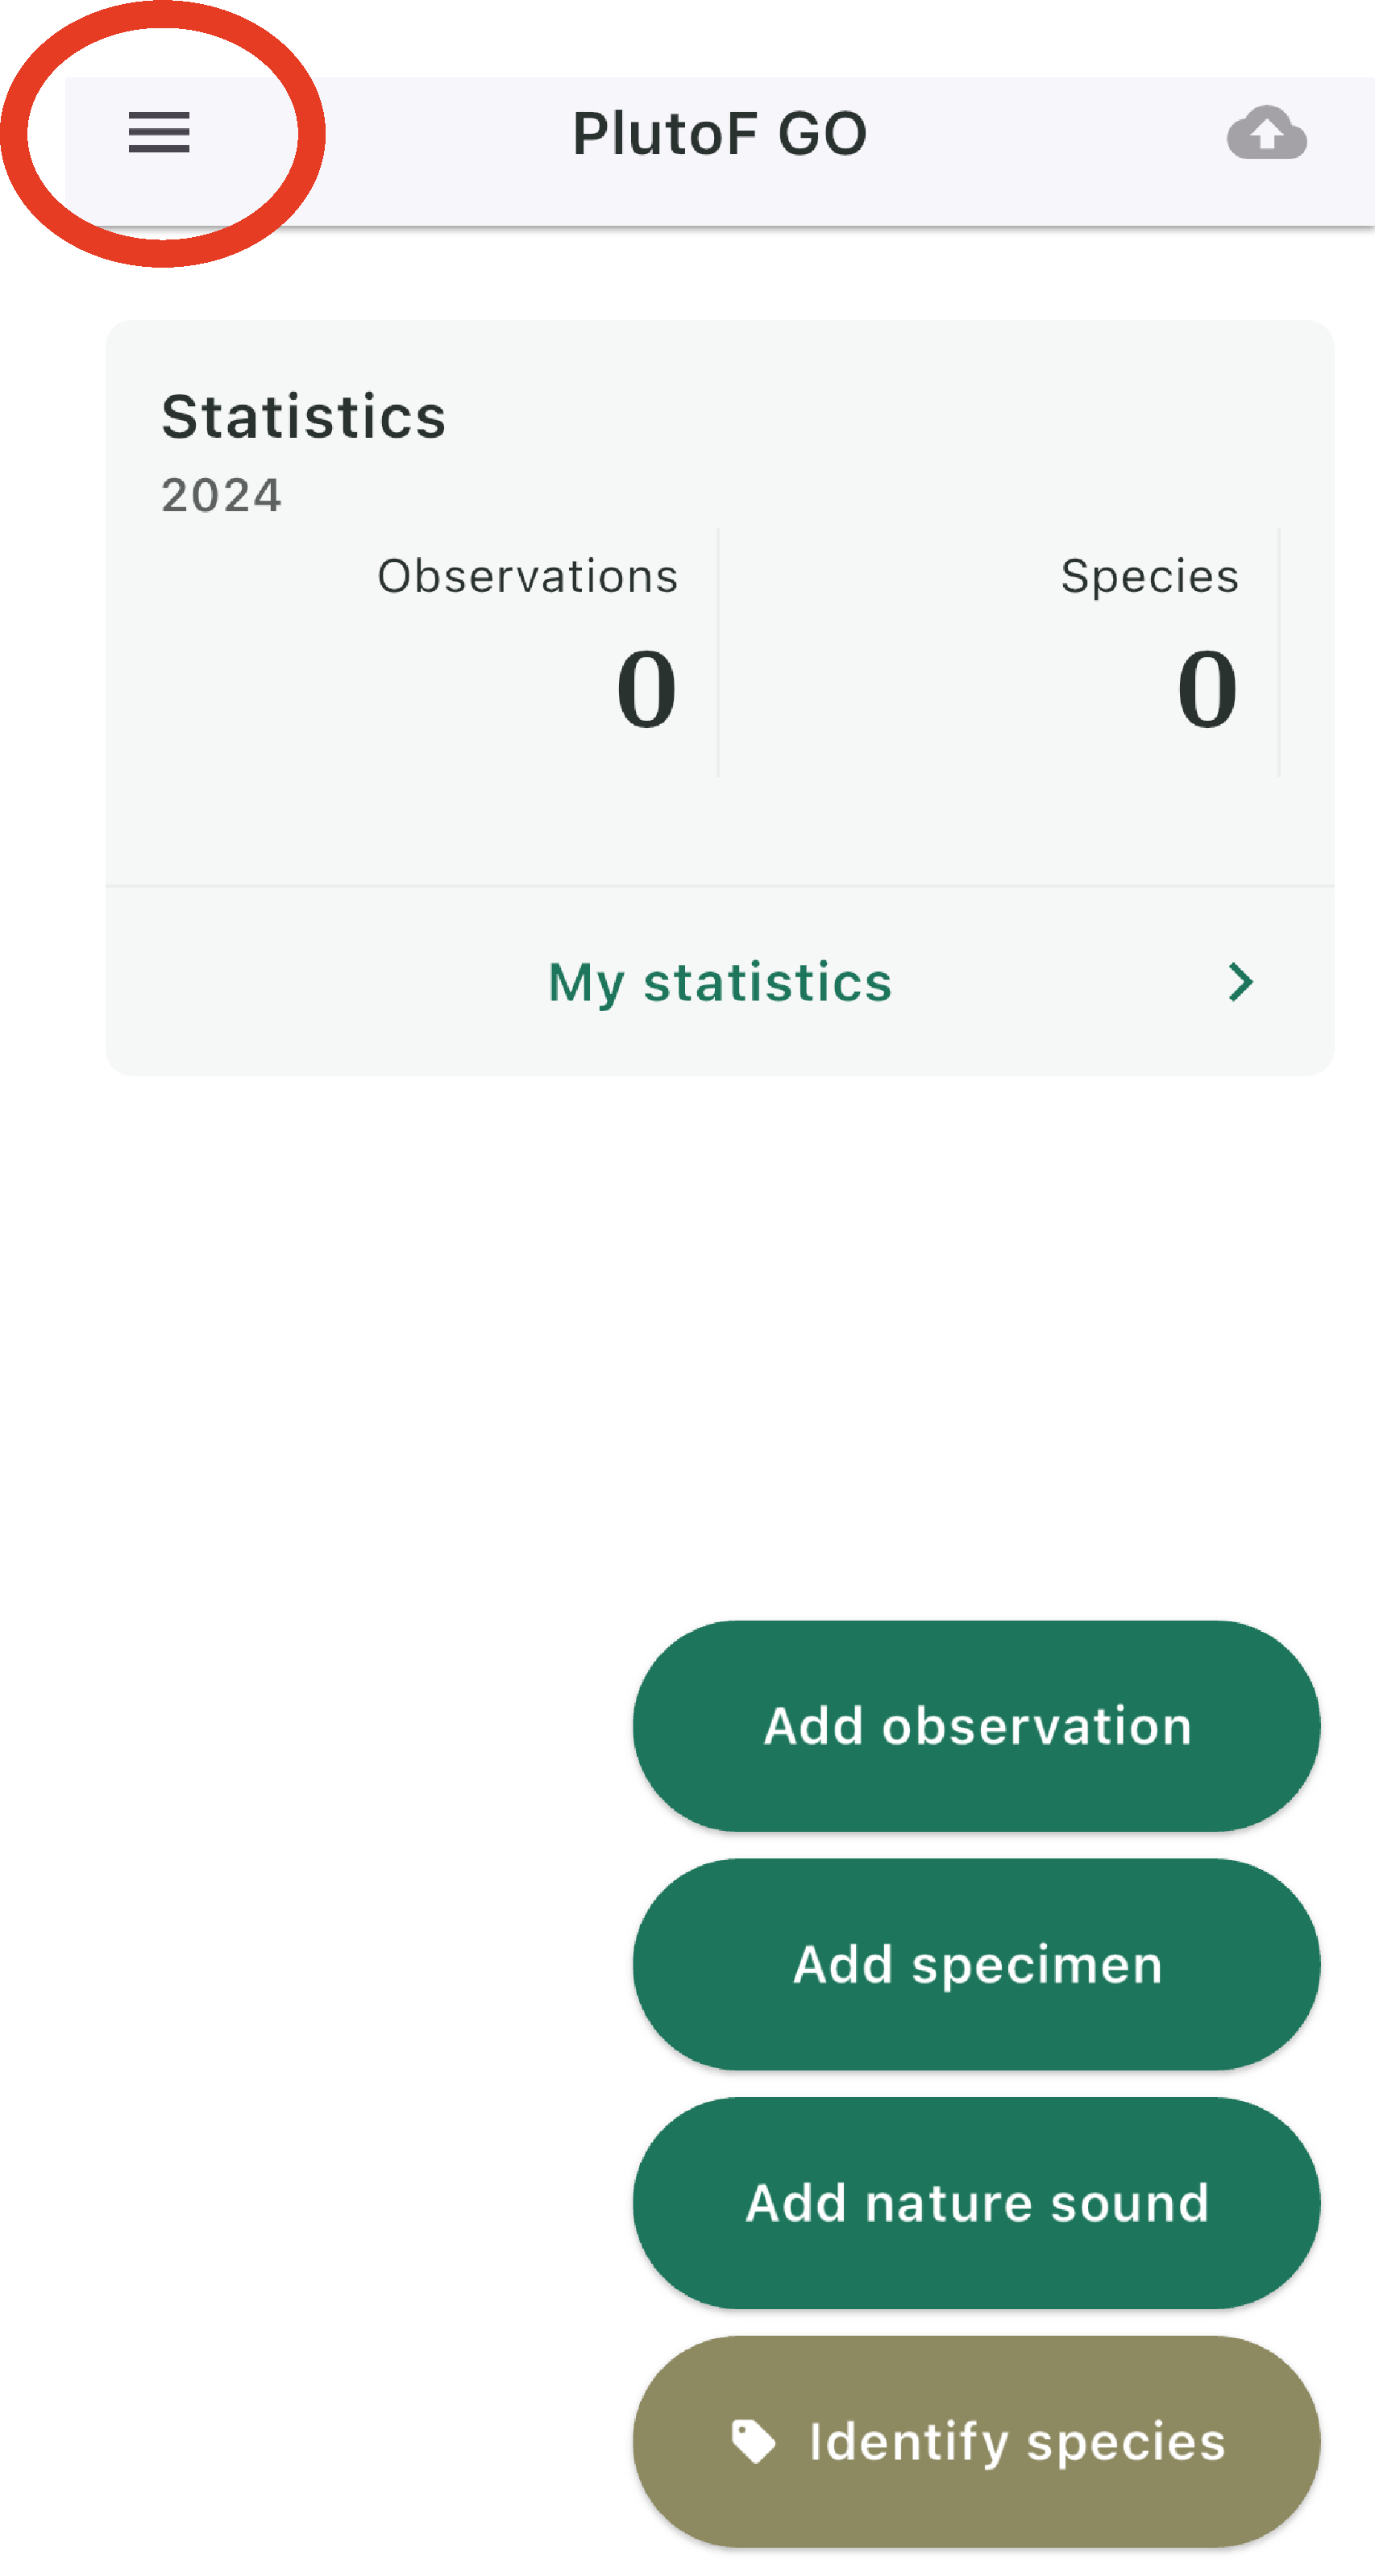
Add samples
Open PlutoF GO
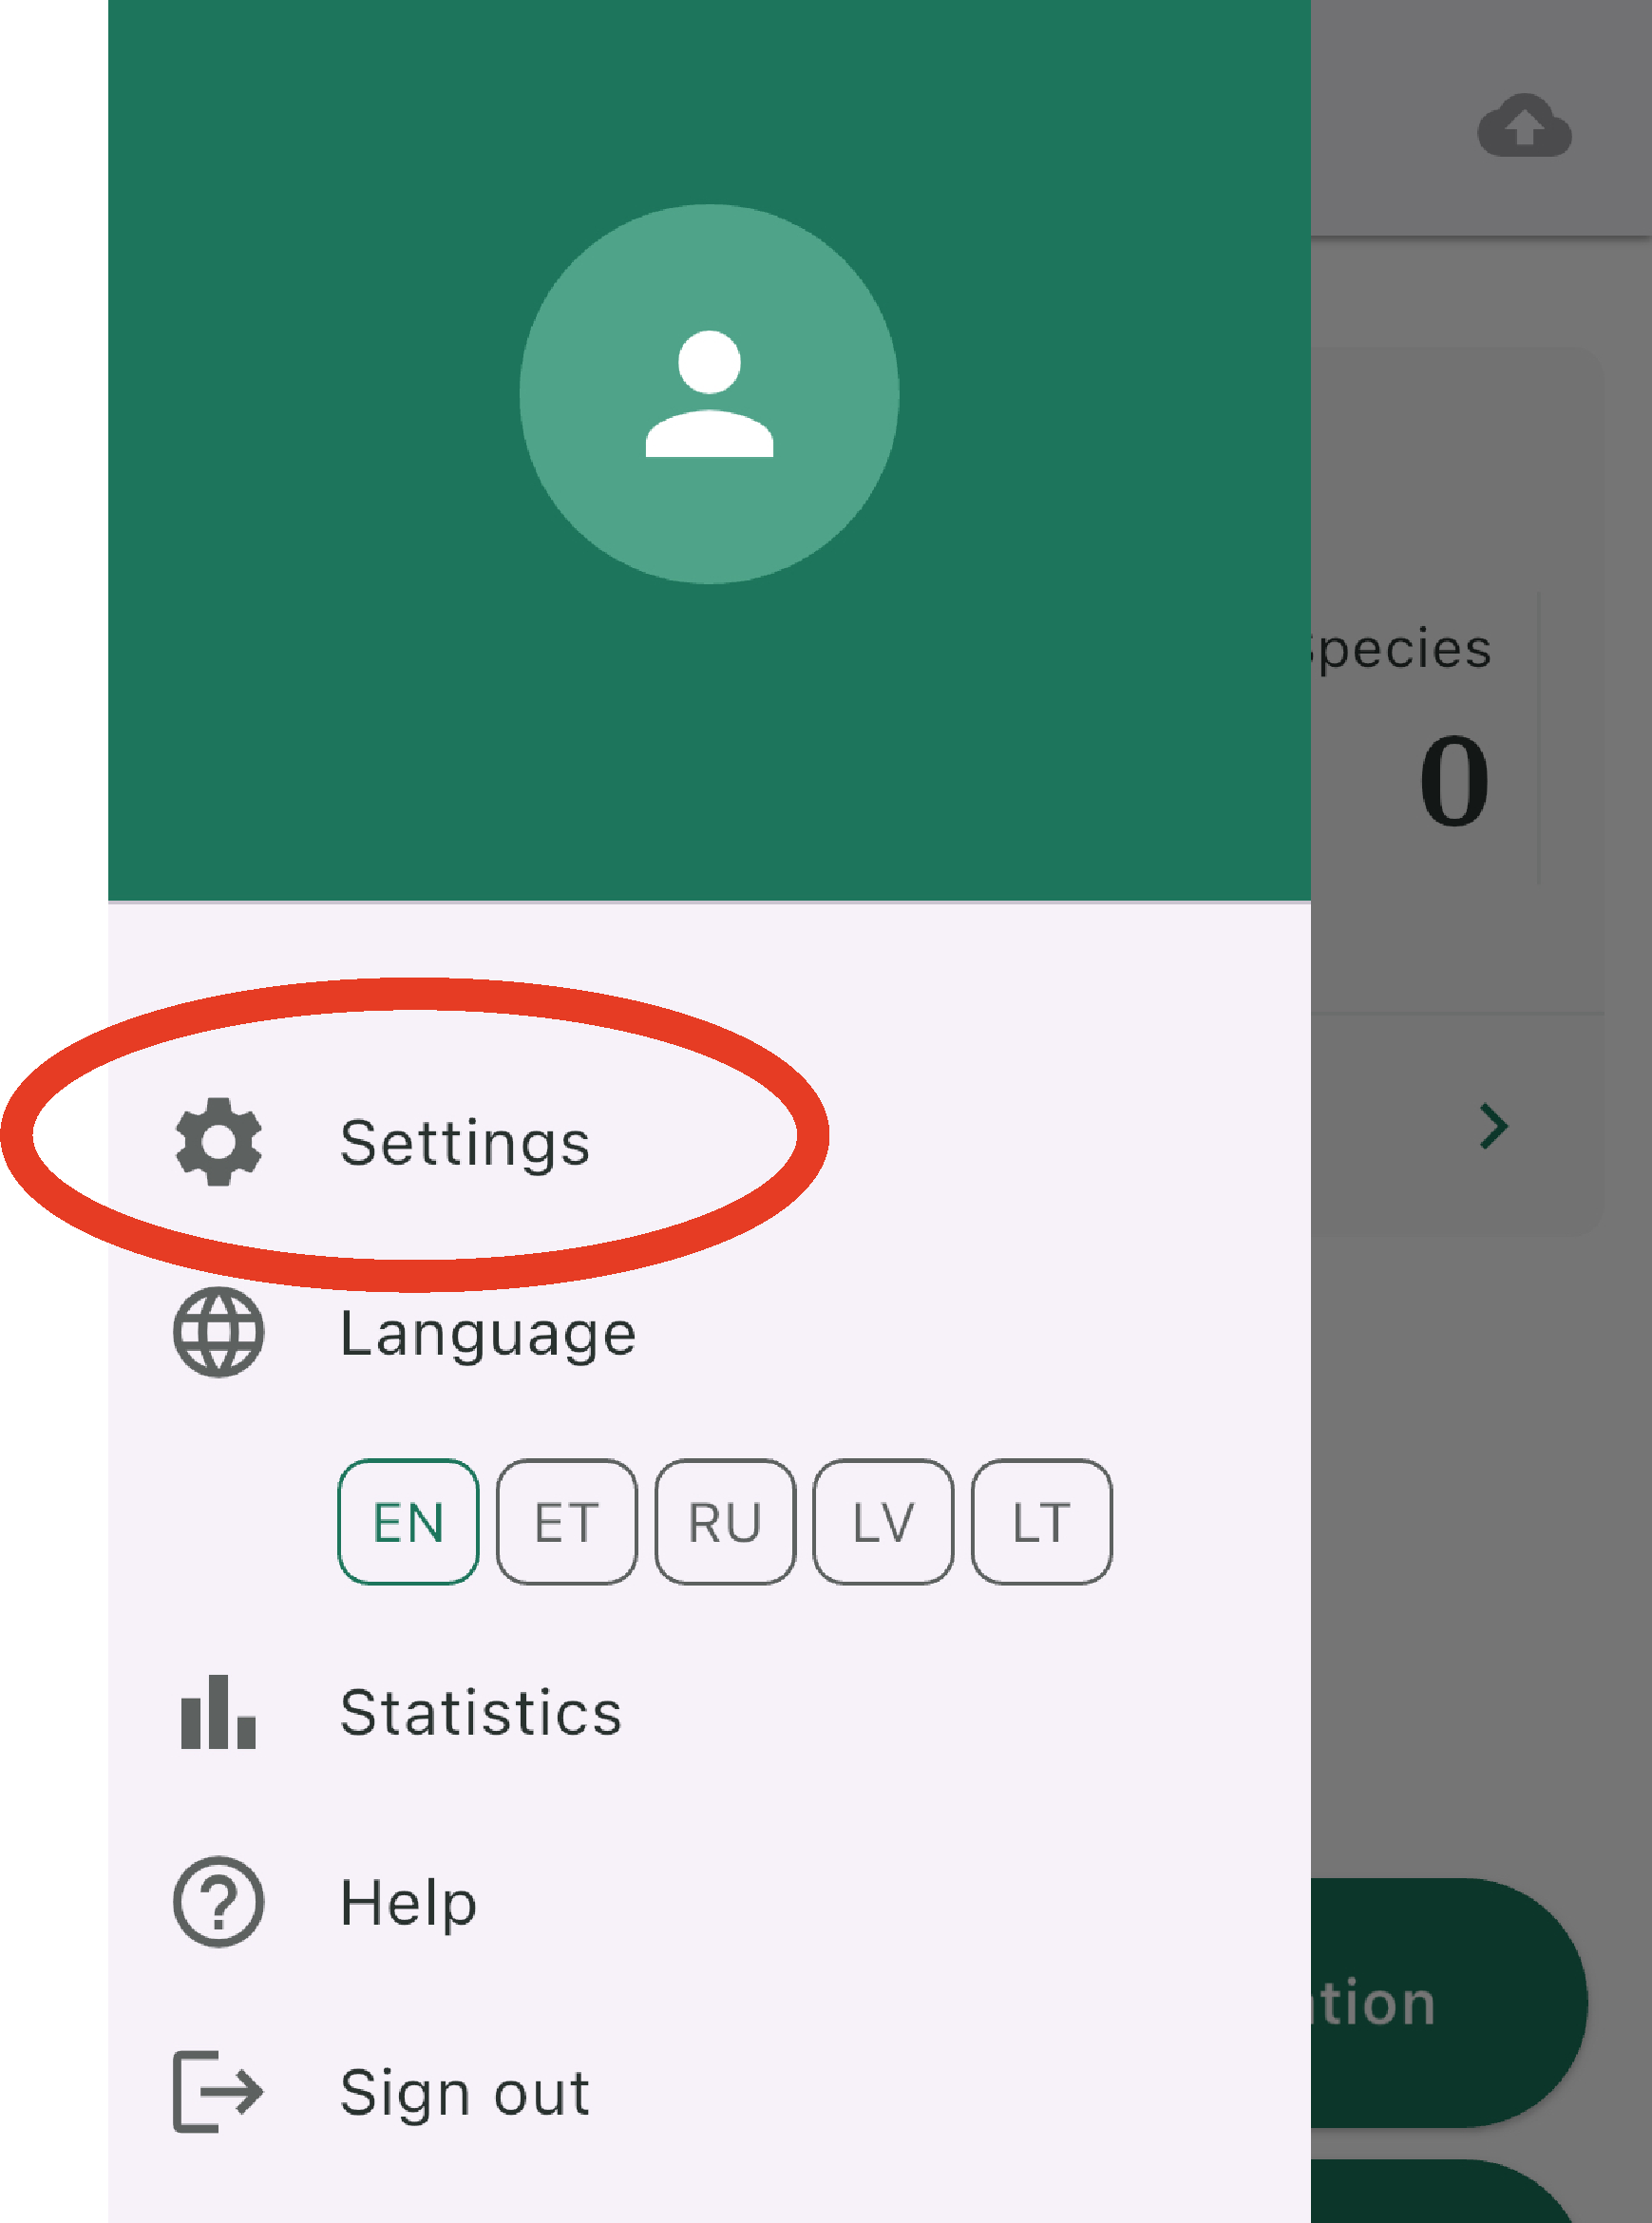
- 1. Open the PlutoF GO application on your phone/tablet,
and enable material sample gathering through ‘Settings’.
 →
→  →
→ 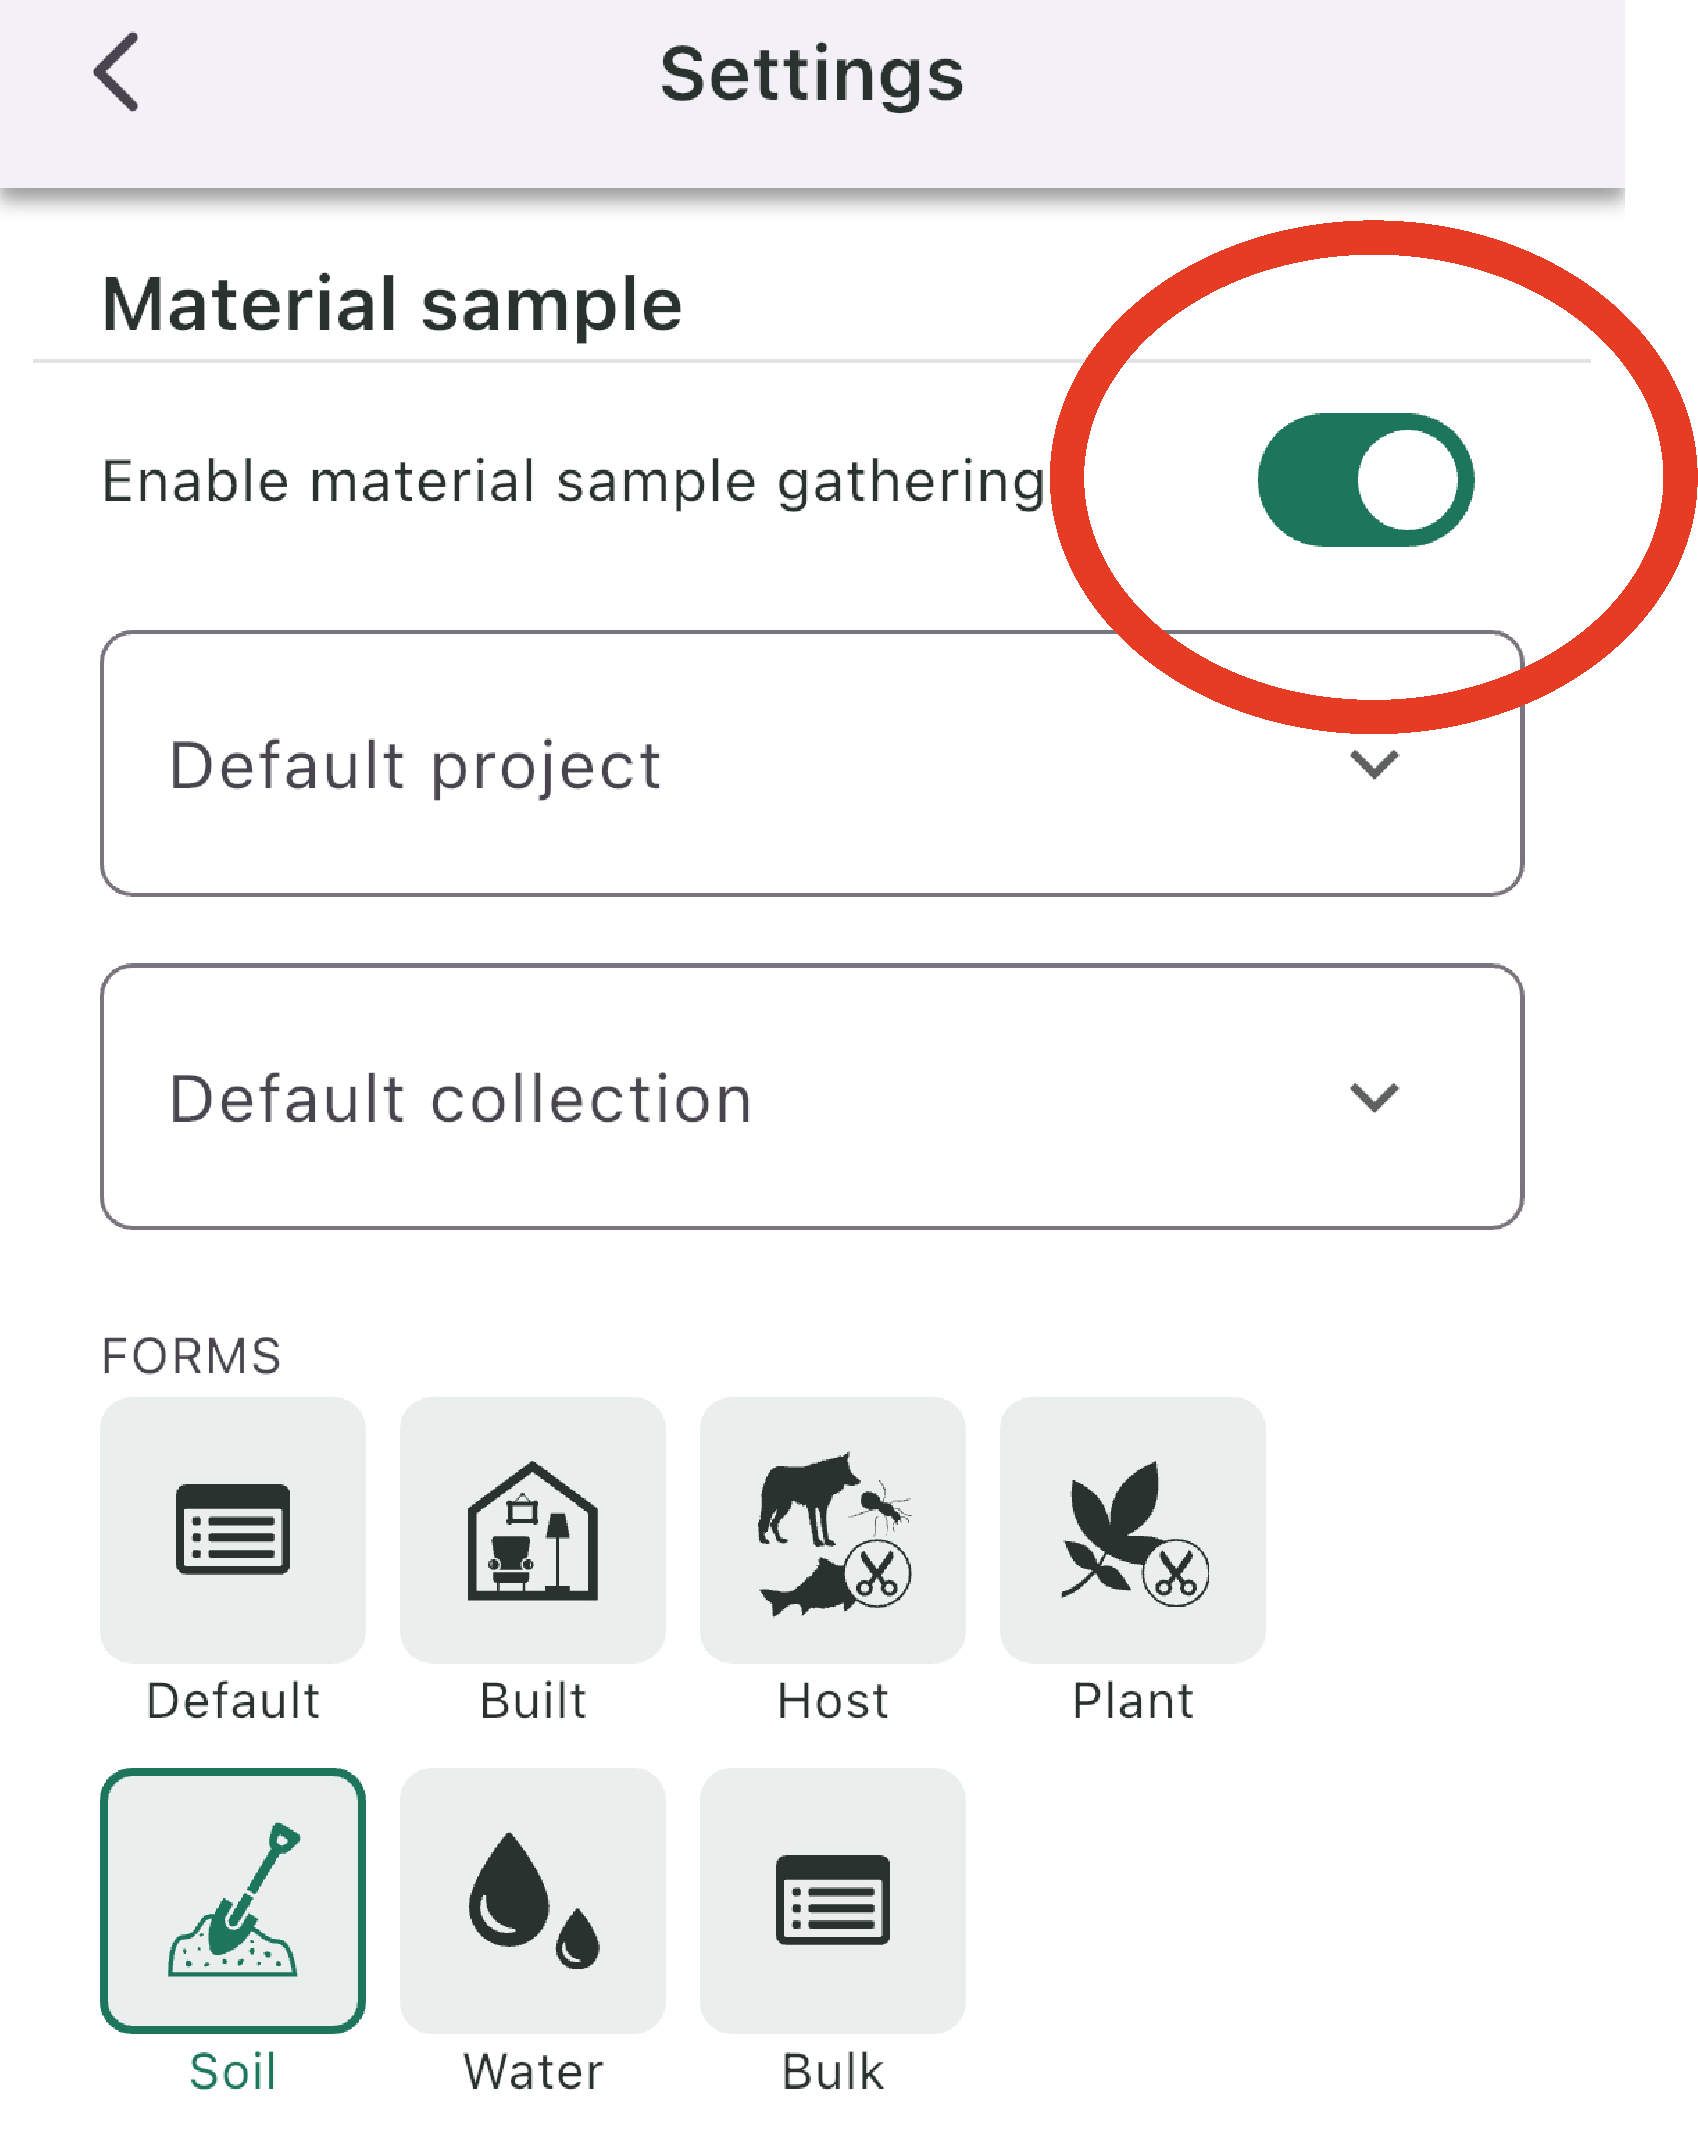
Add material sample is now displayed on the main screen.
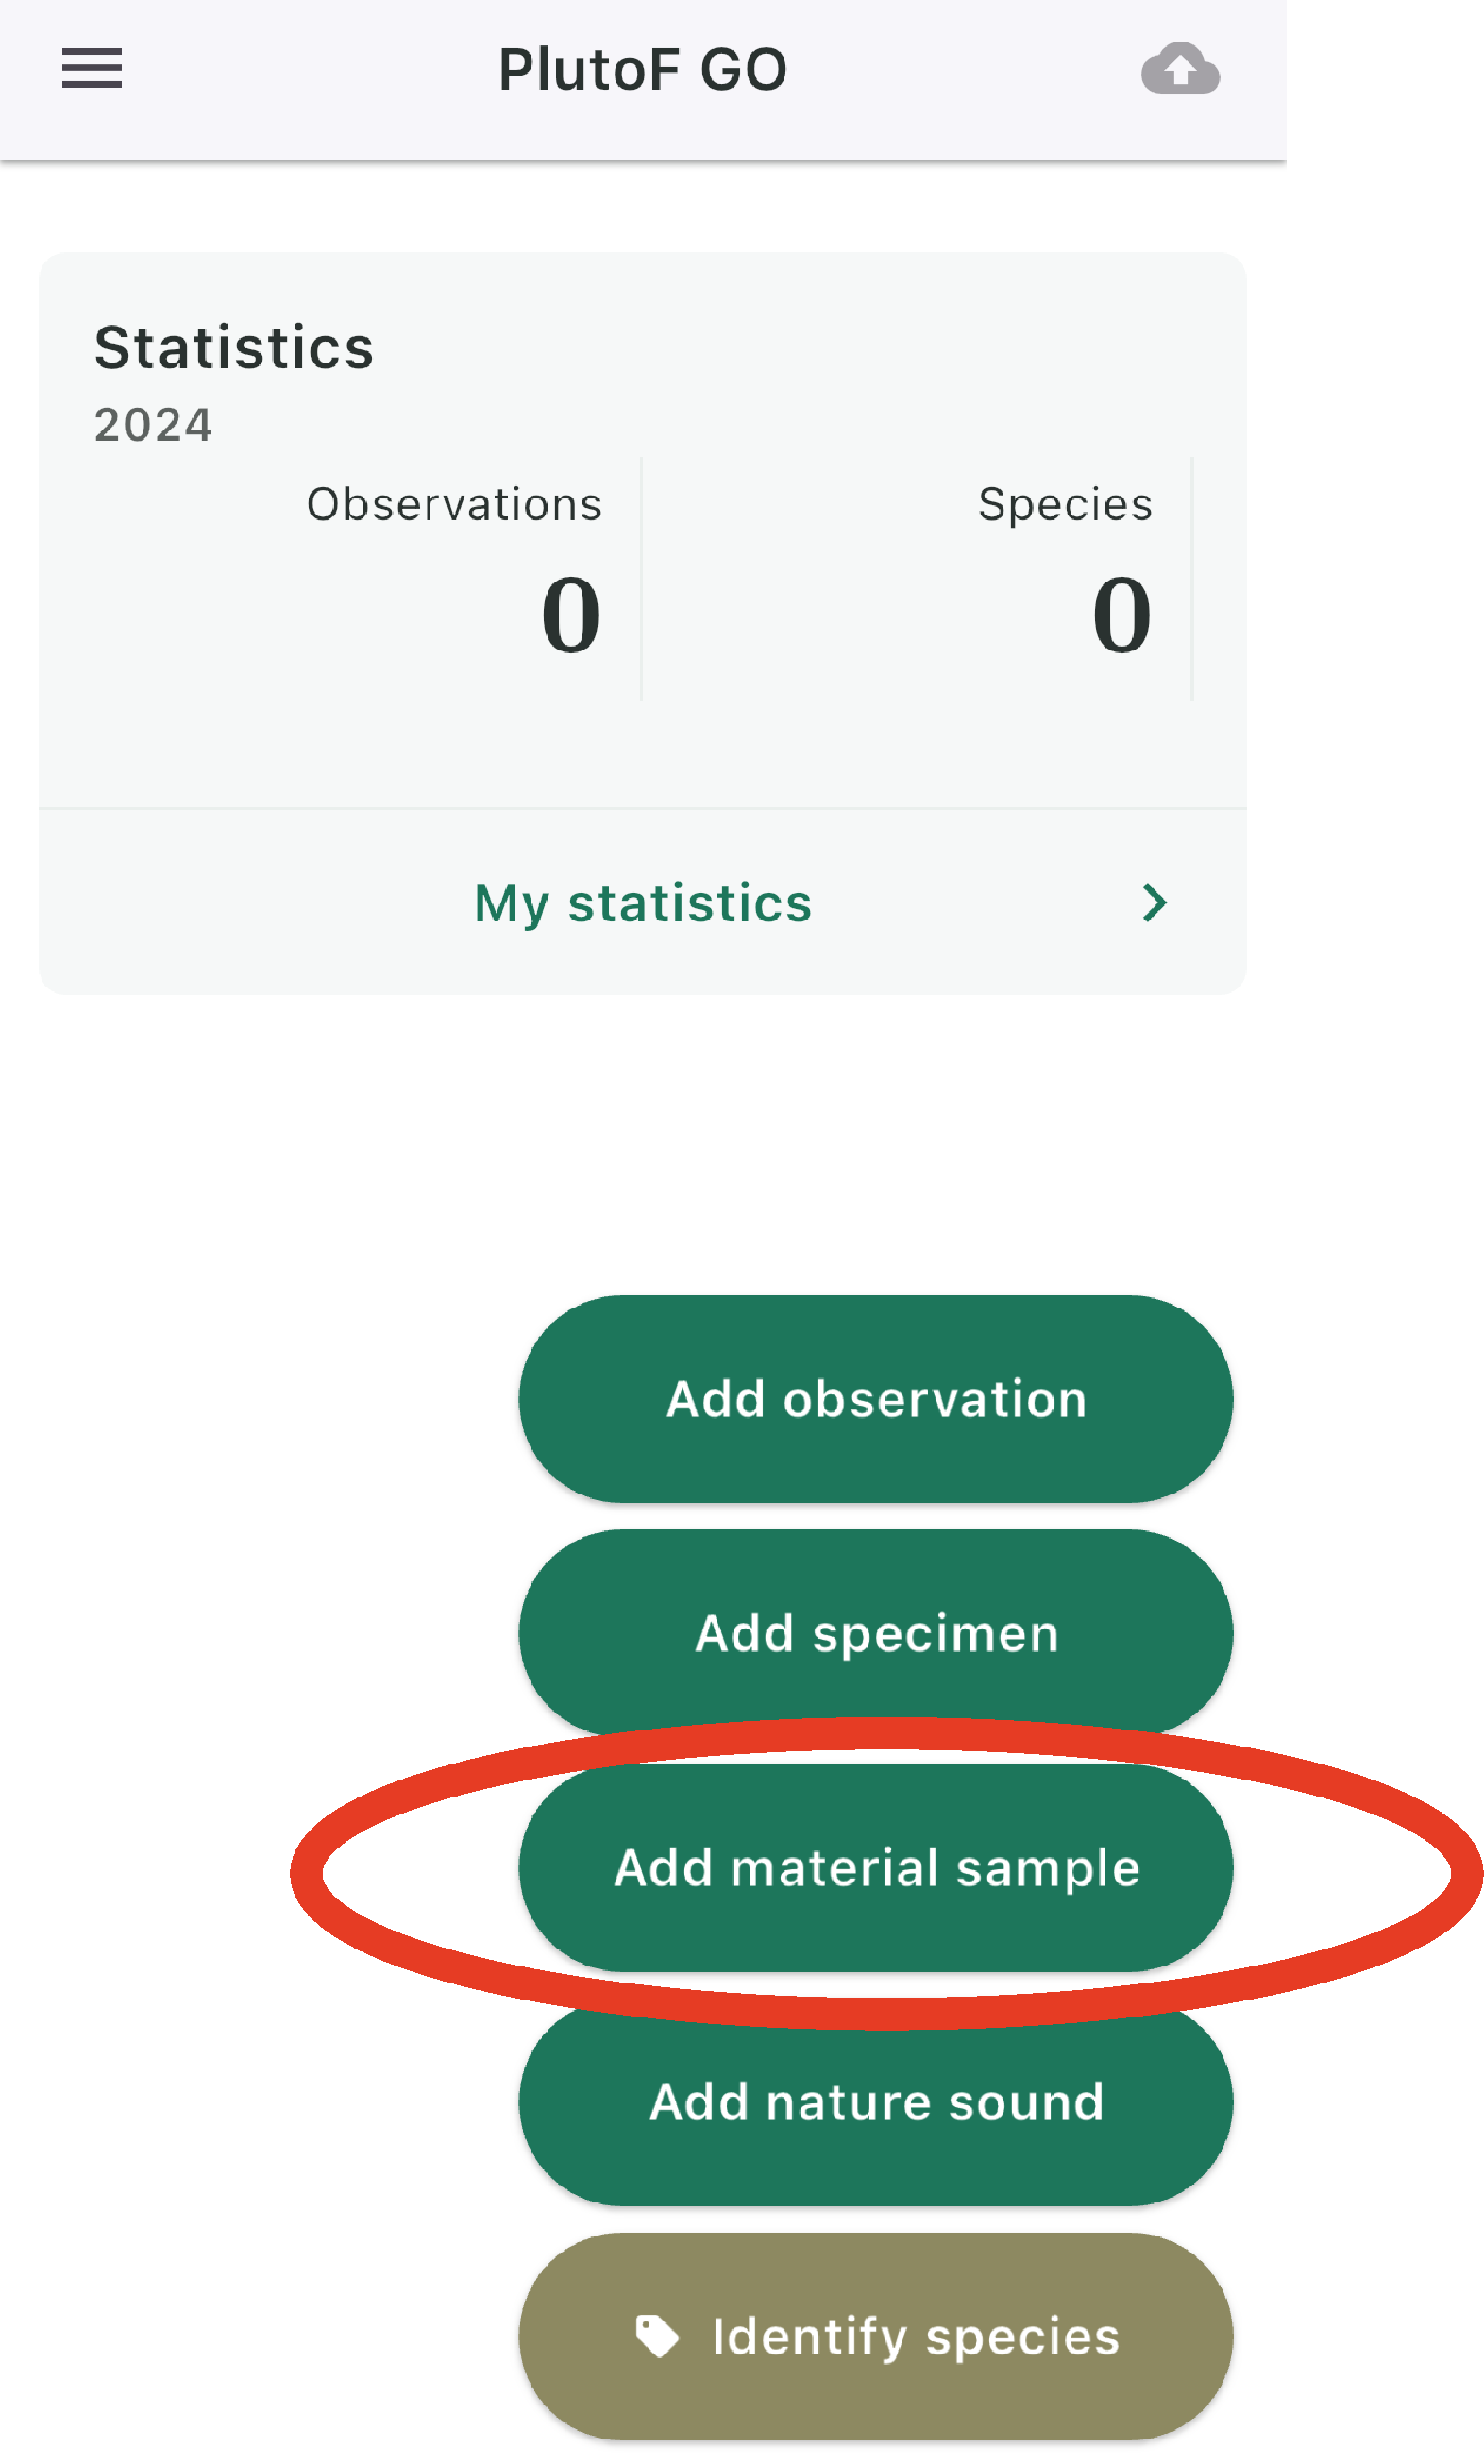
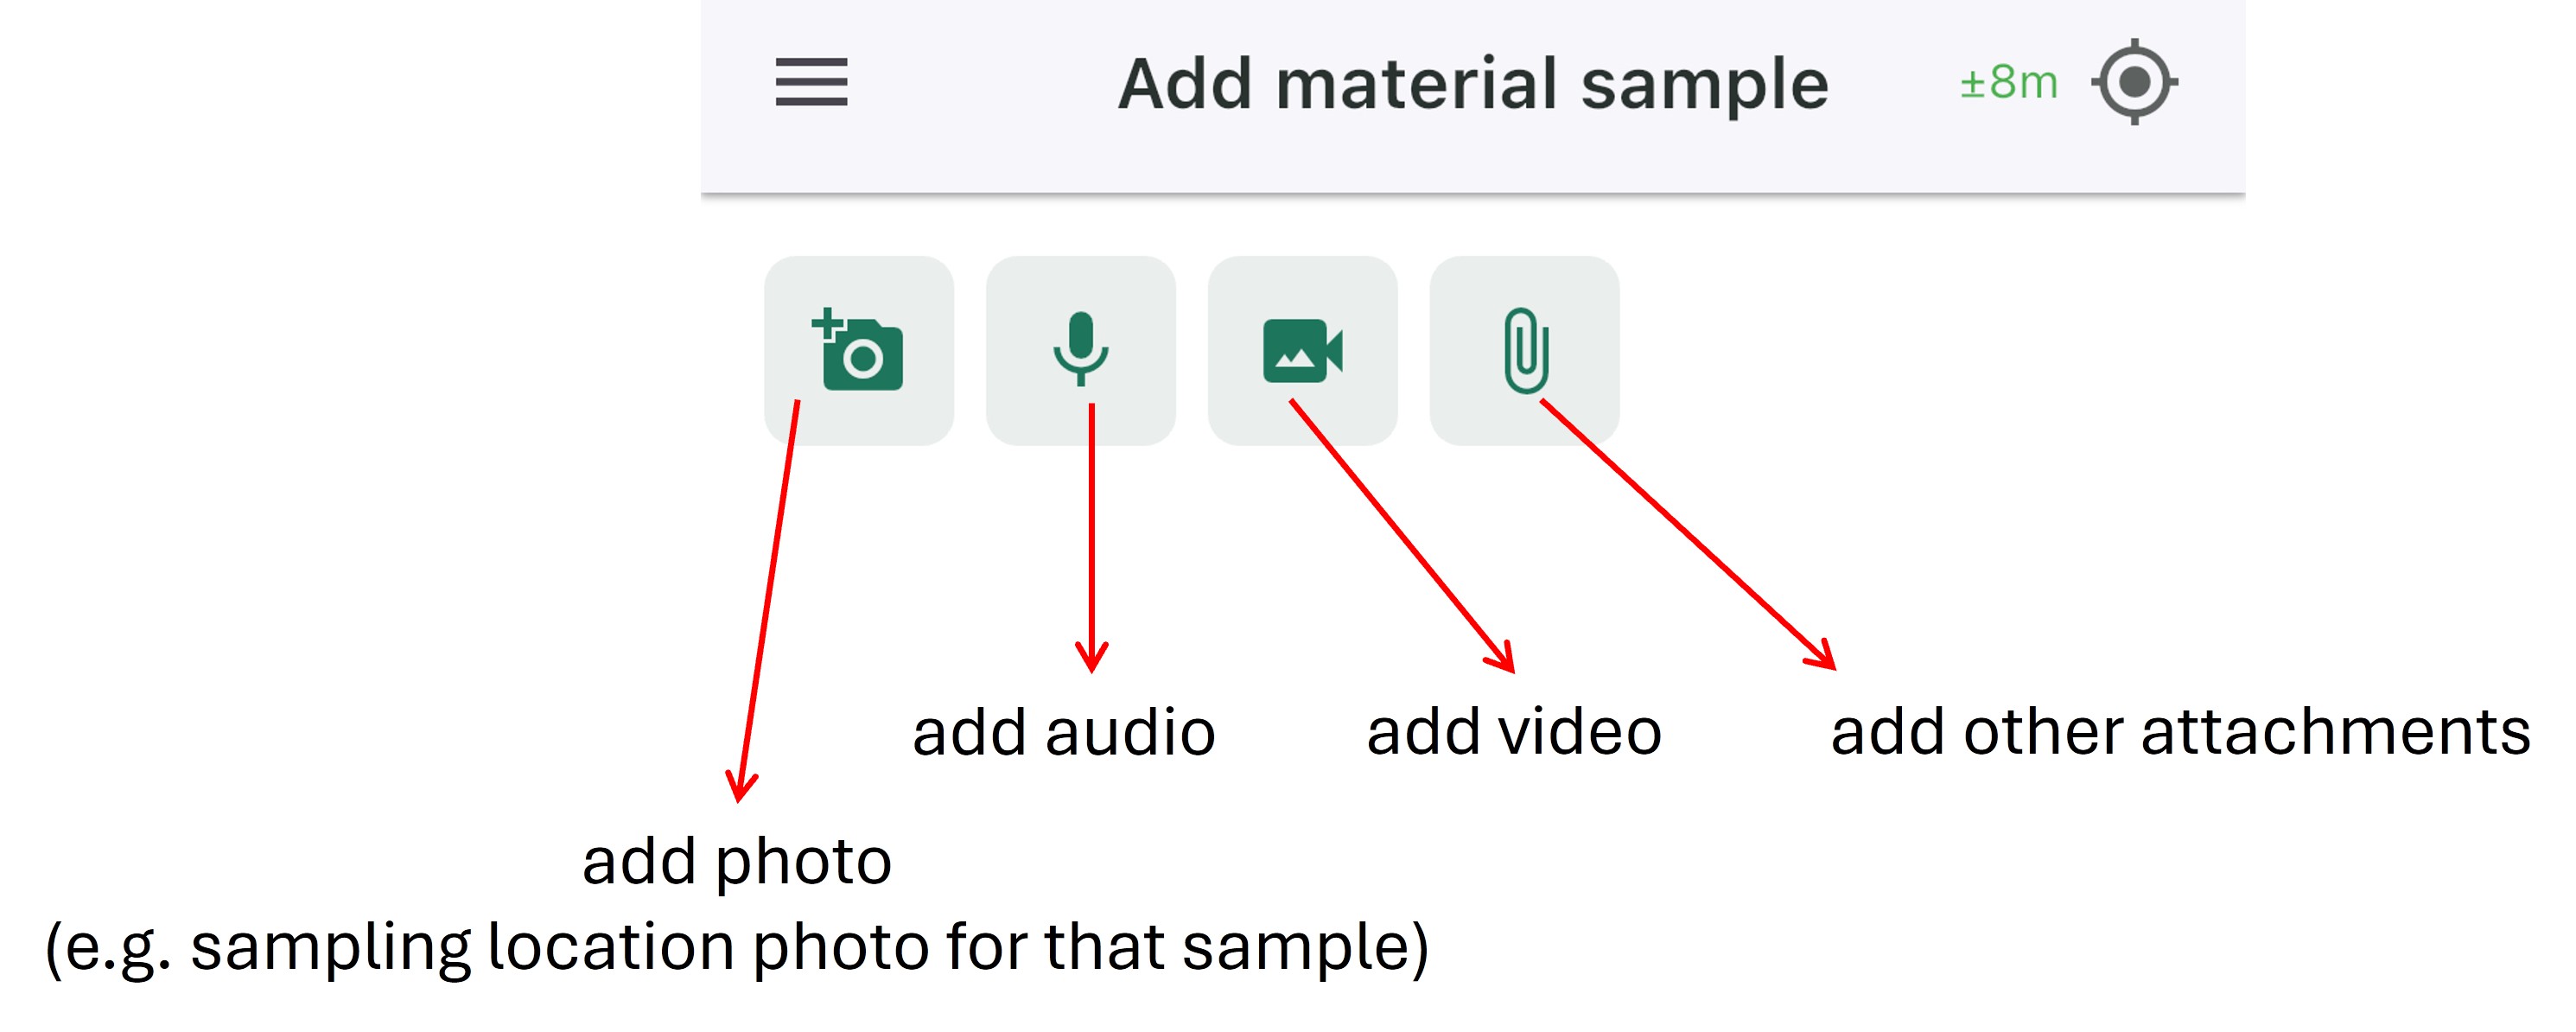
Add material sample
Add material sample.Location box)Choose Project (mandatory)
Location box)Add Sample ID (mandatory)
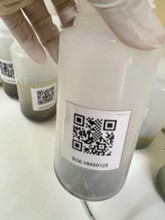
Example of a QR code sticker on a sample, ready for scanning with the PlutoF GO app.
Fill other optional fields
save the record.Note that images, videos, audio and other sample associated files can be also added.
Upload
save the records are only locally saved; and can be edited.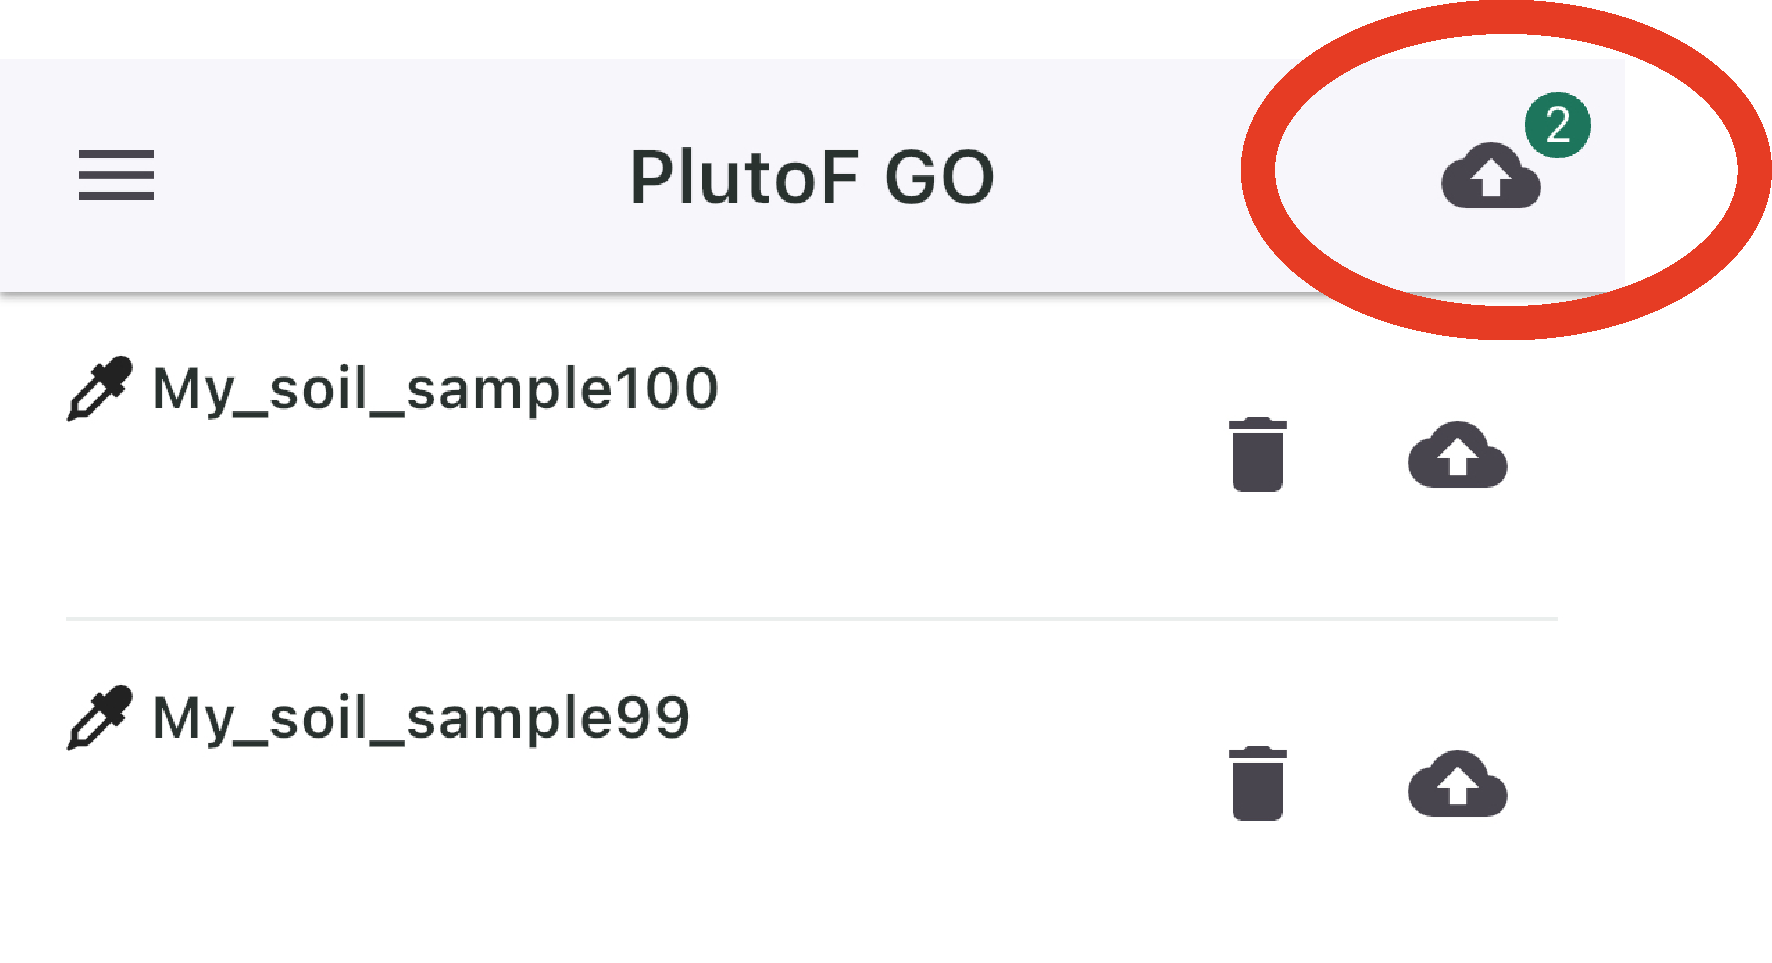
Note
Examples of “material sample” data entry using PlutoF GO for soil, and malaise trap samples are included also in the SOPs in the BGE case studies section.
Managing sample data on the PlutoF workbench
Once the data has been uploaded from the PlutoF GO app (or imported via CSV files), it can be validated, organised, and further edited on the PlutoF workbench. All records can be updated individually or in bulk (via functionality in Clipboard).
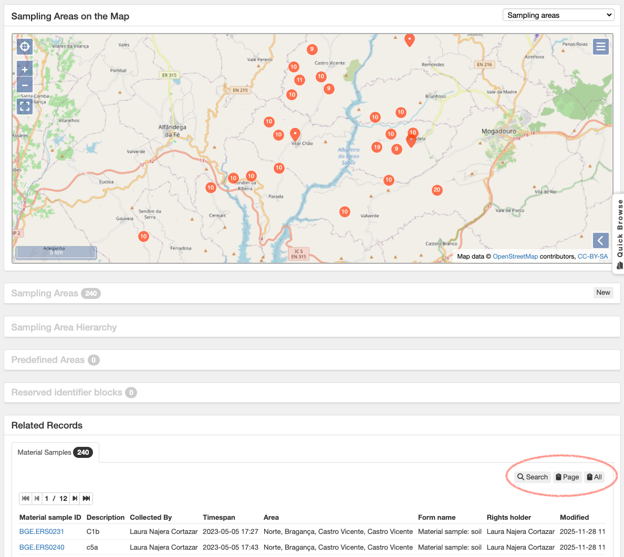
Project view; red circle indicate (bottom left) links to project-related search and clipboard functionalities
Uploading sample records to ENA
ENA (European Nucleotide Archive) is an internationally recognized public repository for nucleotide sequence data and associated sample metadata, ensuring your data is findable, accessible, and reusable.
While PlutoF facilitates biodiversity data management, the raw metabarcoding sequence data cannot be deposited to PlutoF. Therefore, PlutoF enables automated submission of sample records to ENA, where samples can be linked to raw sequence data.
Using the Publishing module in PlutoF, users can submit sample records to the ENA database. The PlutoF platform acts as a broker for ENA, utilising its programmatic Webin submission service for sample data submission. The resulting ENA and BioSamples identifiers are stored in PlutoF alongside the original sample records.
Publishing is project-based: all samples within a selected study are submitted together, and the dataset can be updated later by re-publishing.
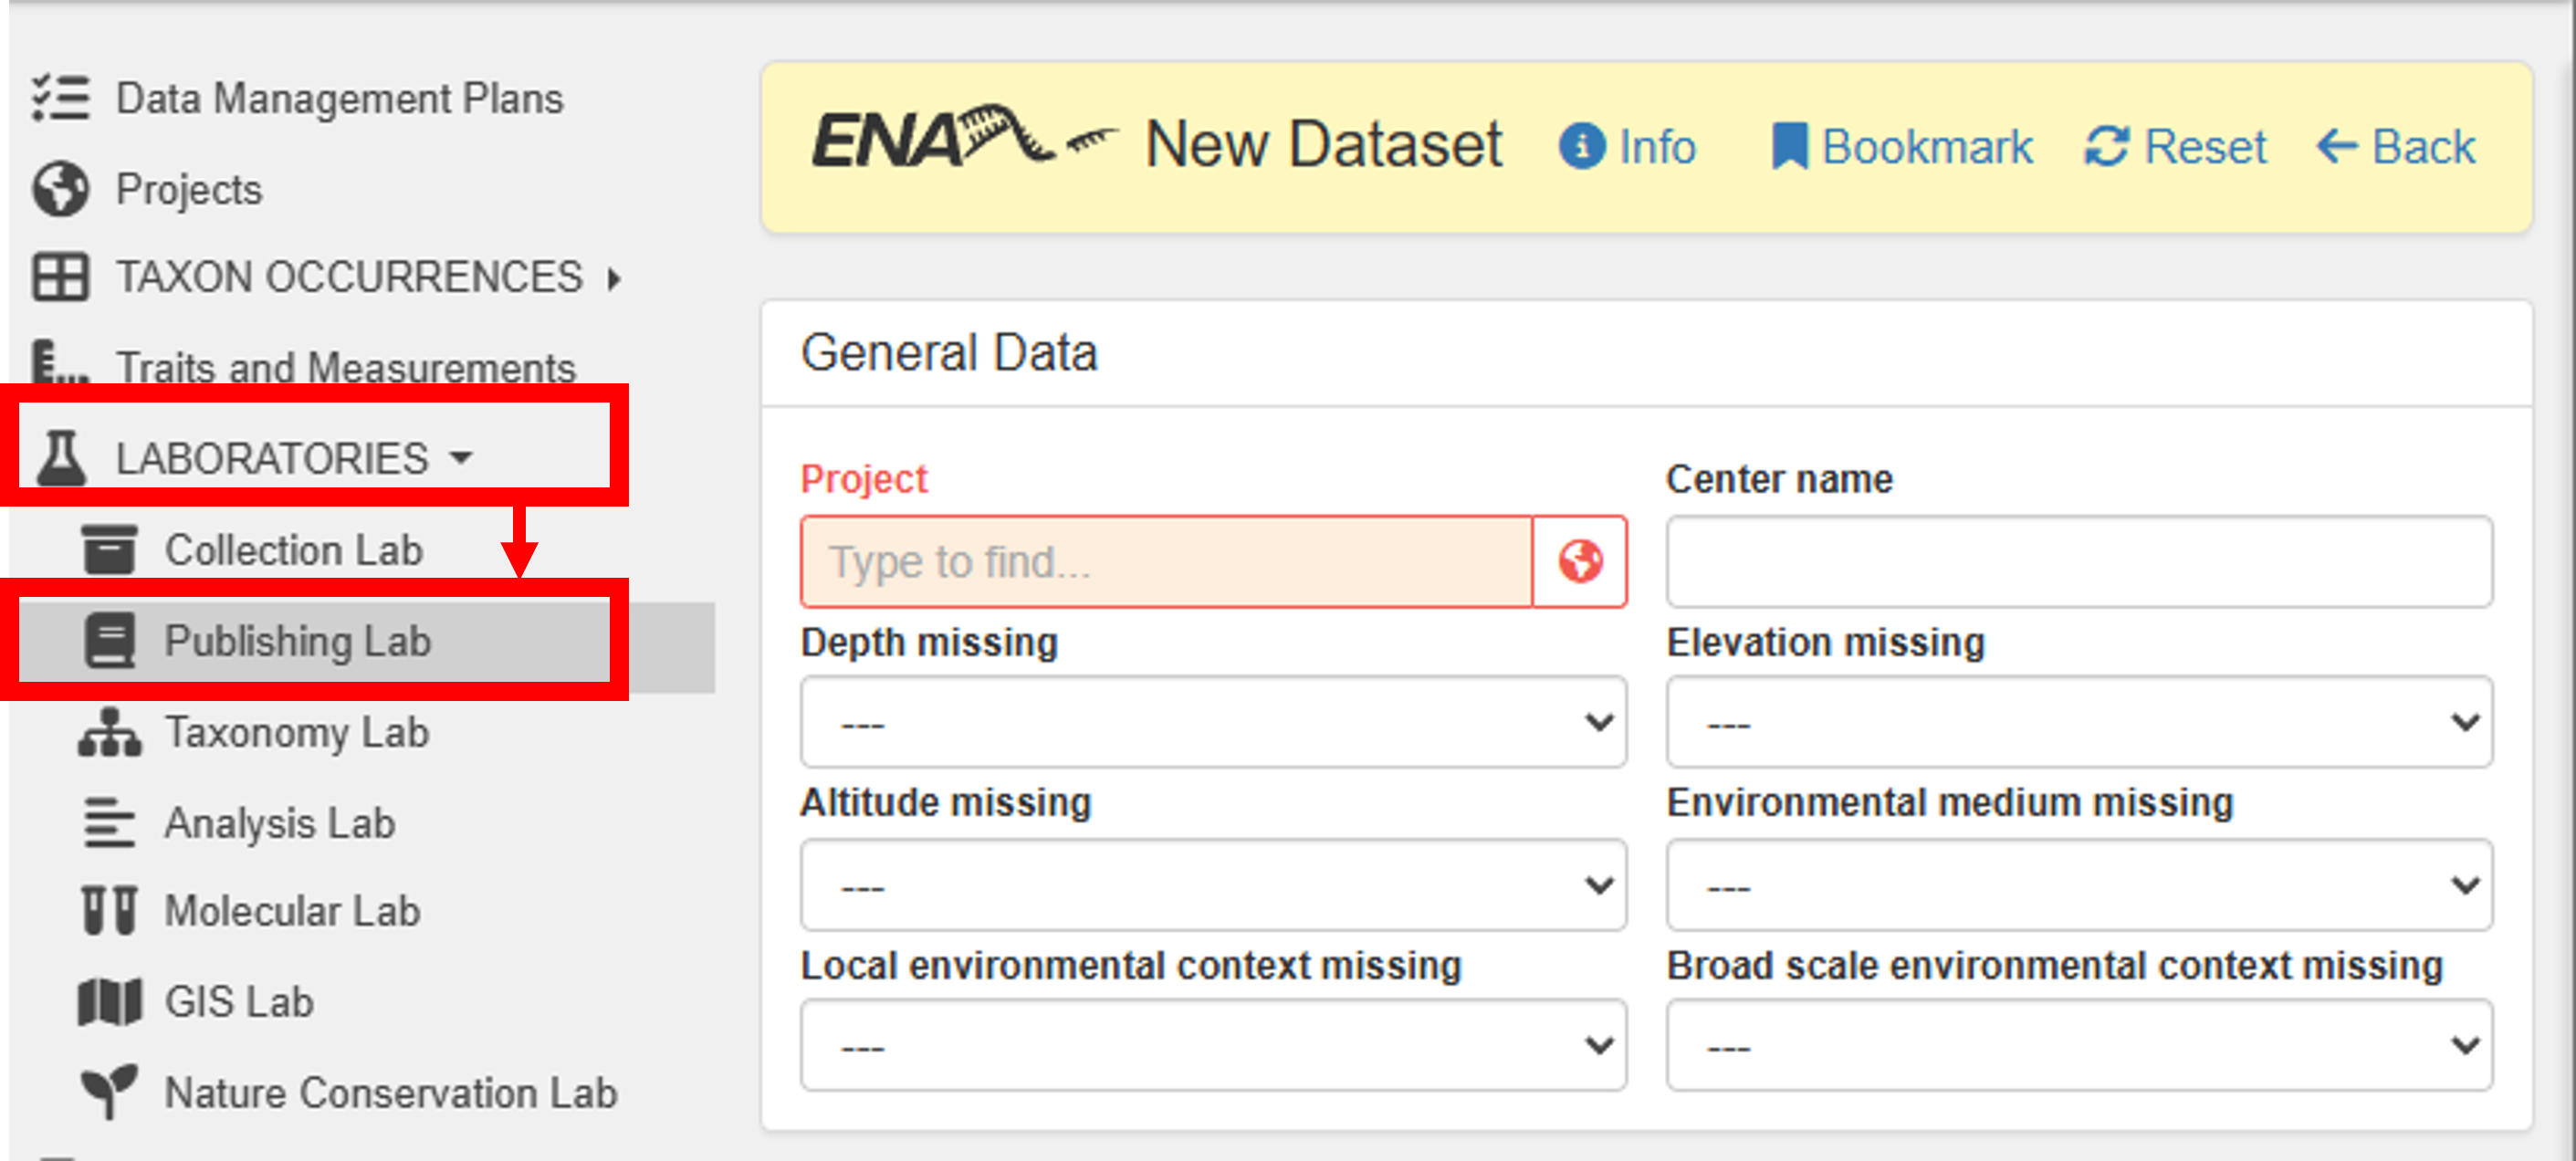
To publish your dataset in ENA, go to Main menu -> Laboratories -> Publishing Lab -> ENA Datasets -> New
Steps to publish:
Note
Samples uploaded to ENA are treated as independent samples - that is, they are not linked to a BioProject. Samples will be linked to a BioProject when the raw sequence data is associated with the samples. See ‘How to Submit Raw Reads’ here
Bulk download of the samples with ENA ID (BioSample IDs) for linking those with raw sequence data
For submitting raw sequence data to ENA, the files need to be linked to the samples with ENA ID (BioSample IDs).
When the samples were uploaded to ENA through the PlutoF platform, the BioSample IDs are stored in PlutoF and can be downloaded in bulk to a CSV file.
Steps to bulk download the samples with ENA ID (BioSample IDs):
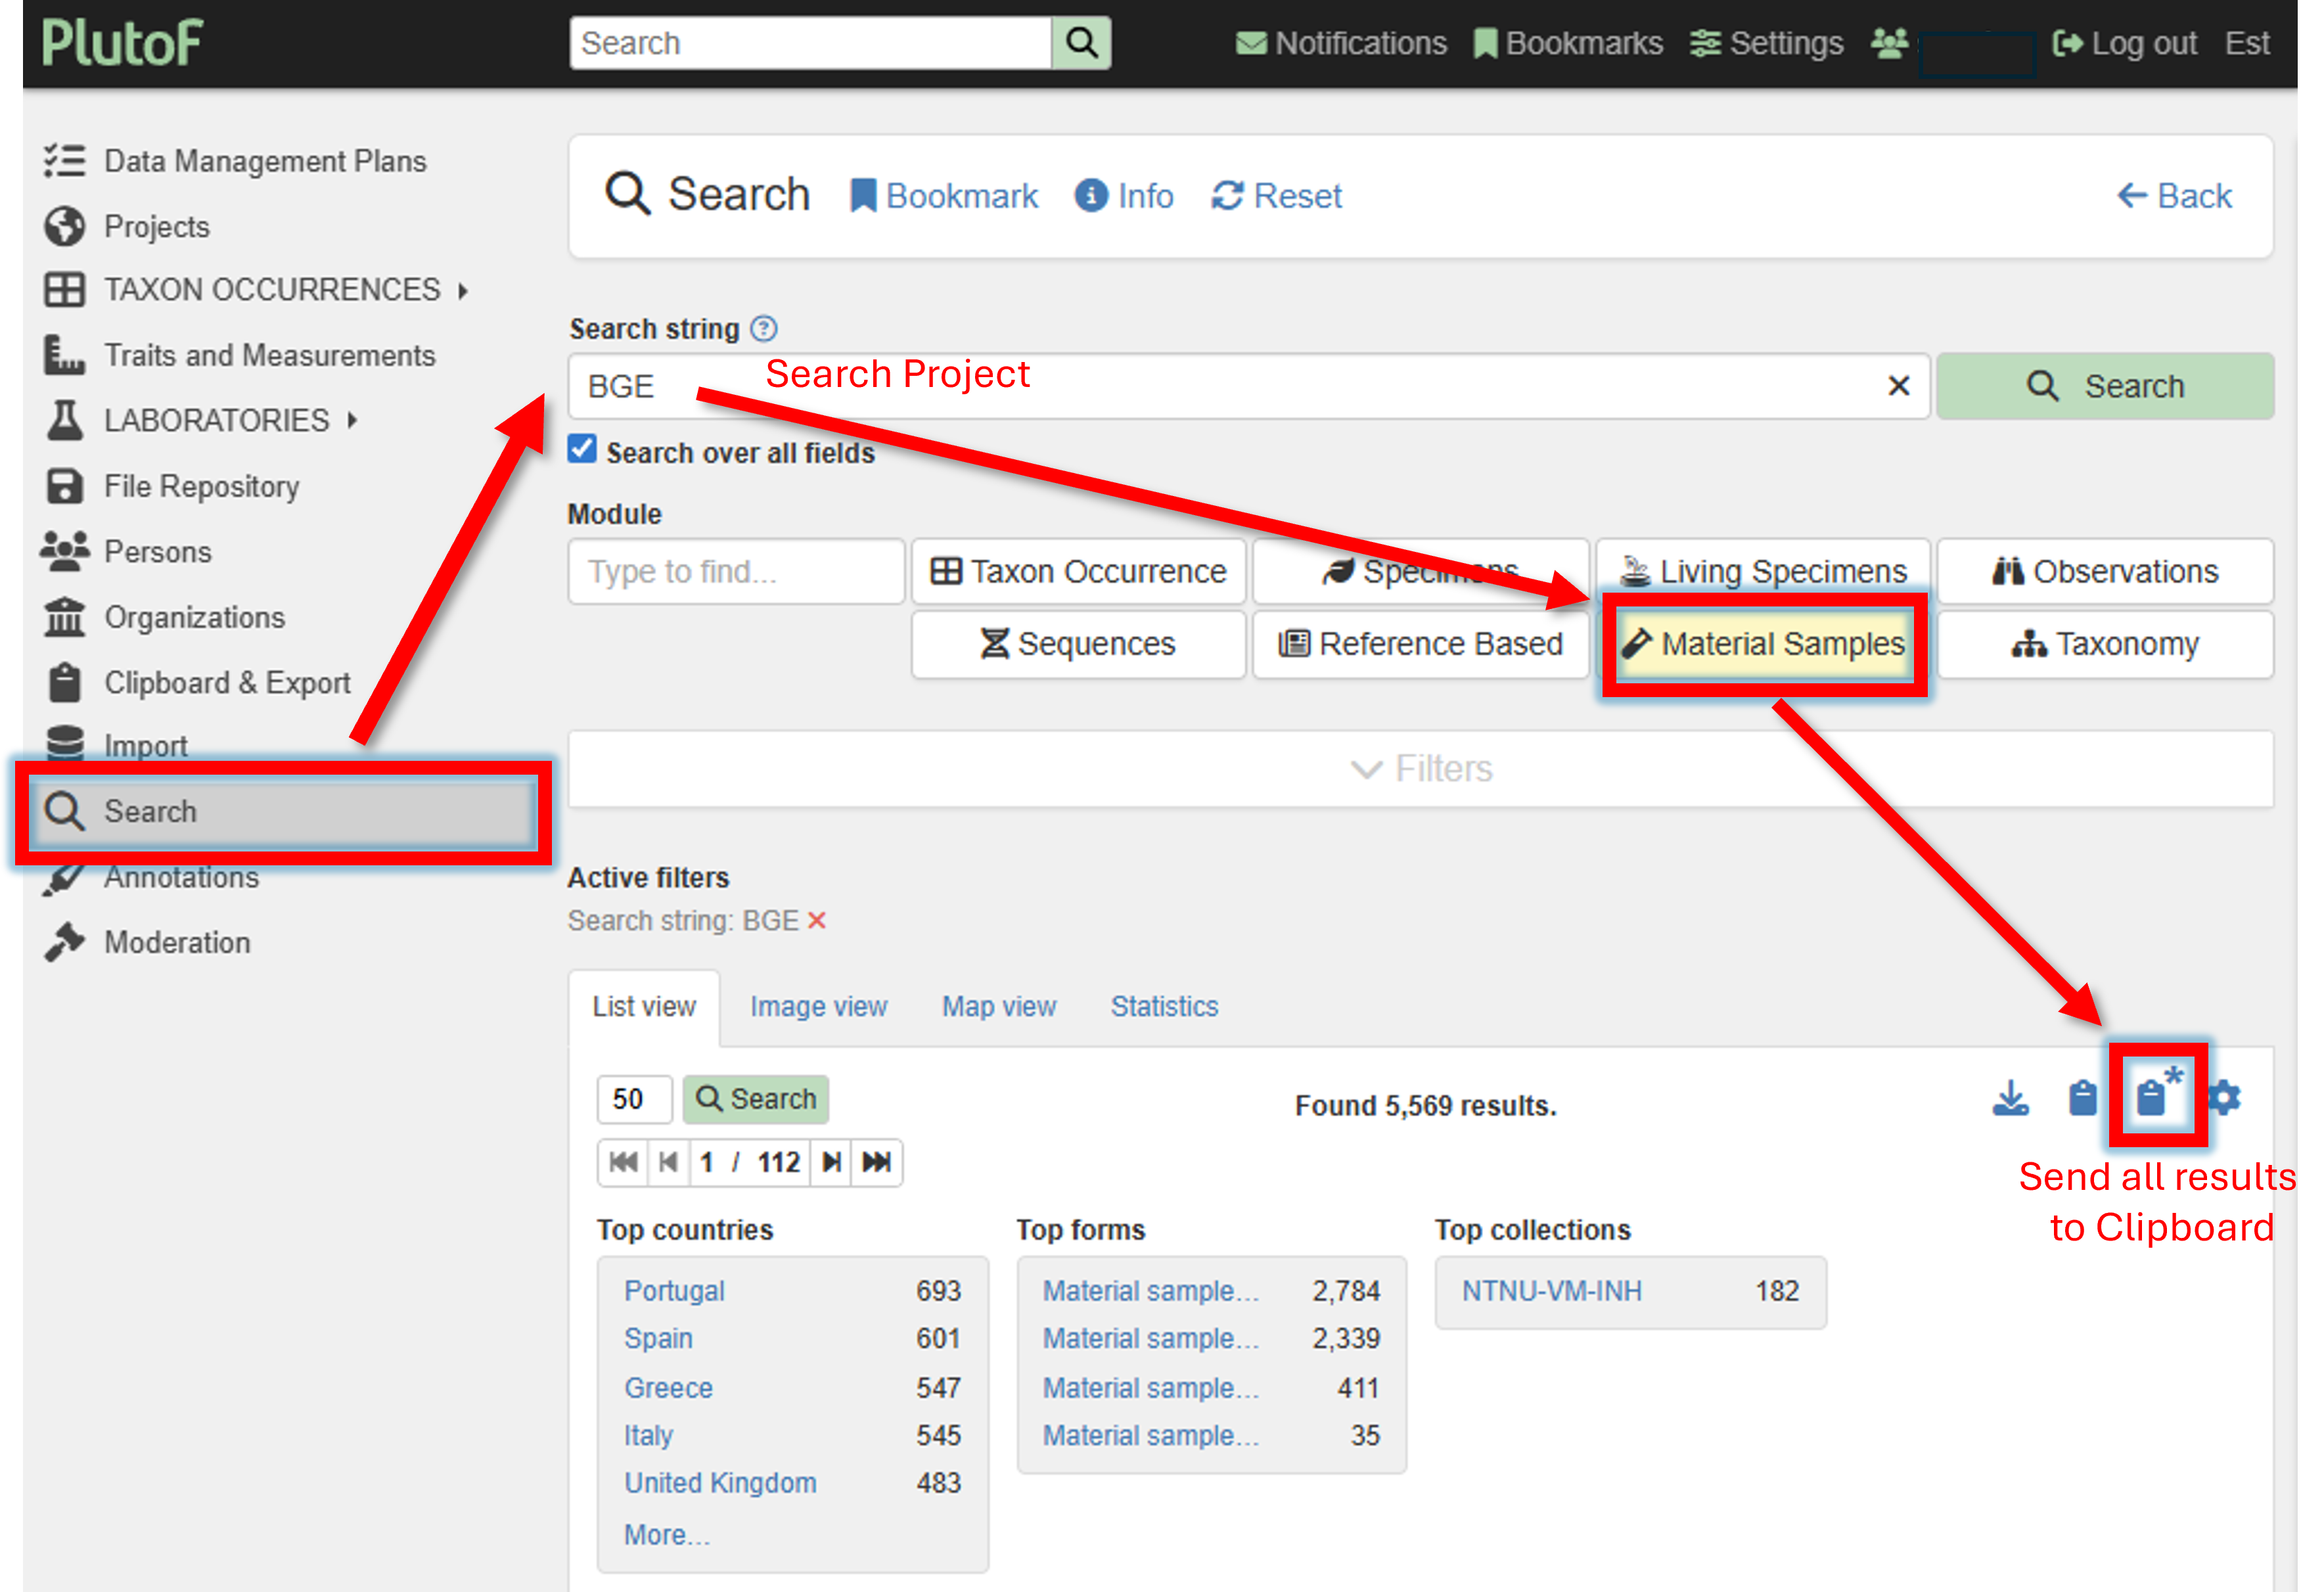
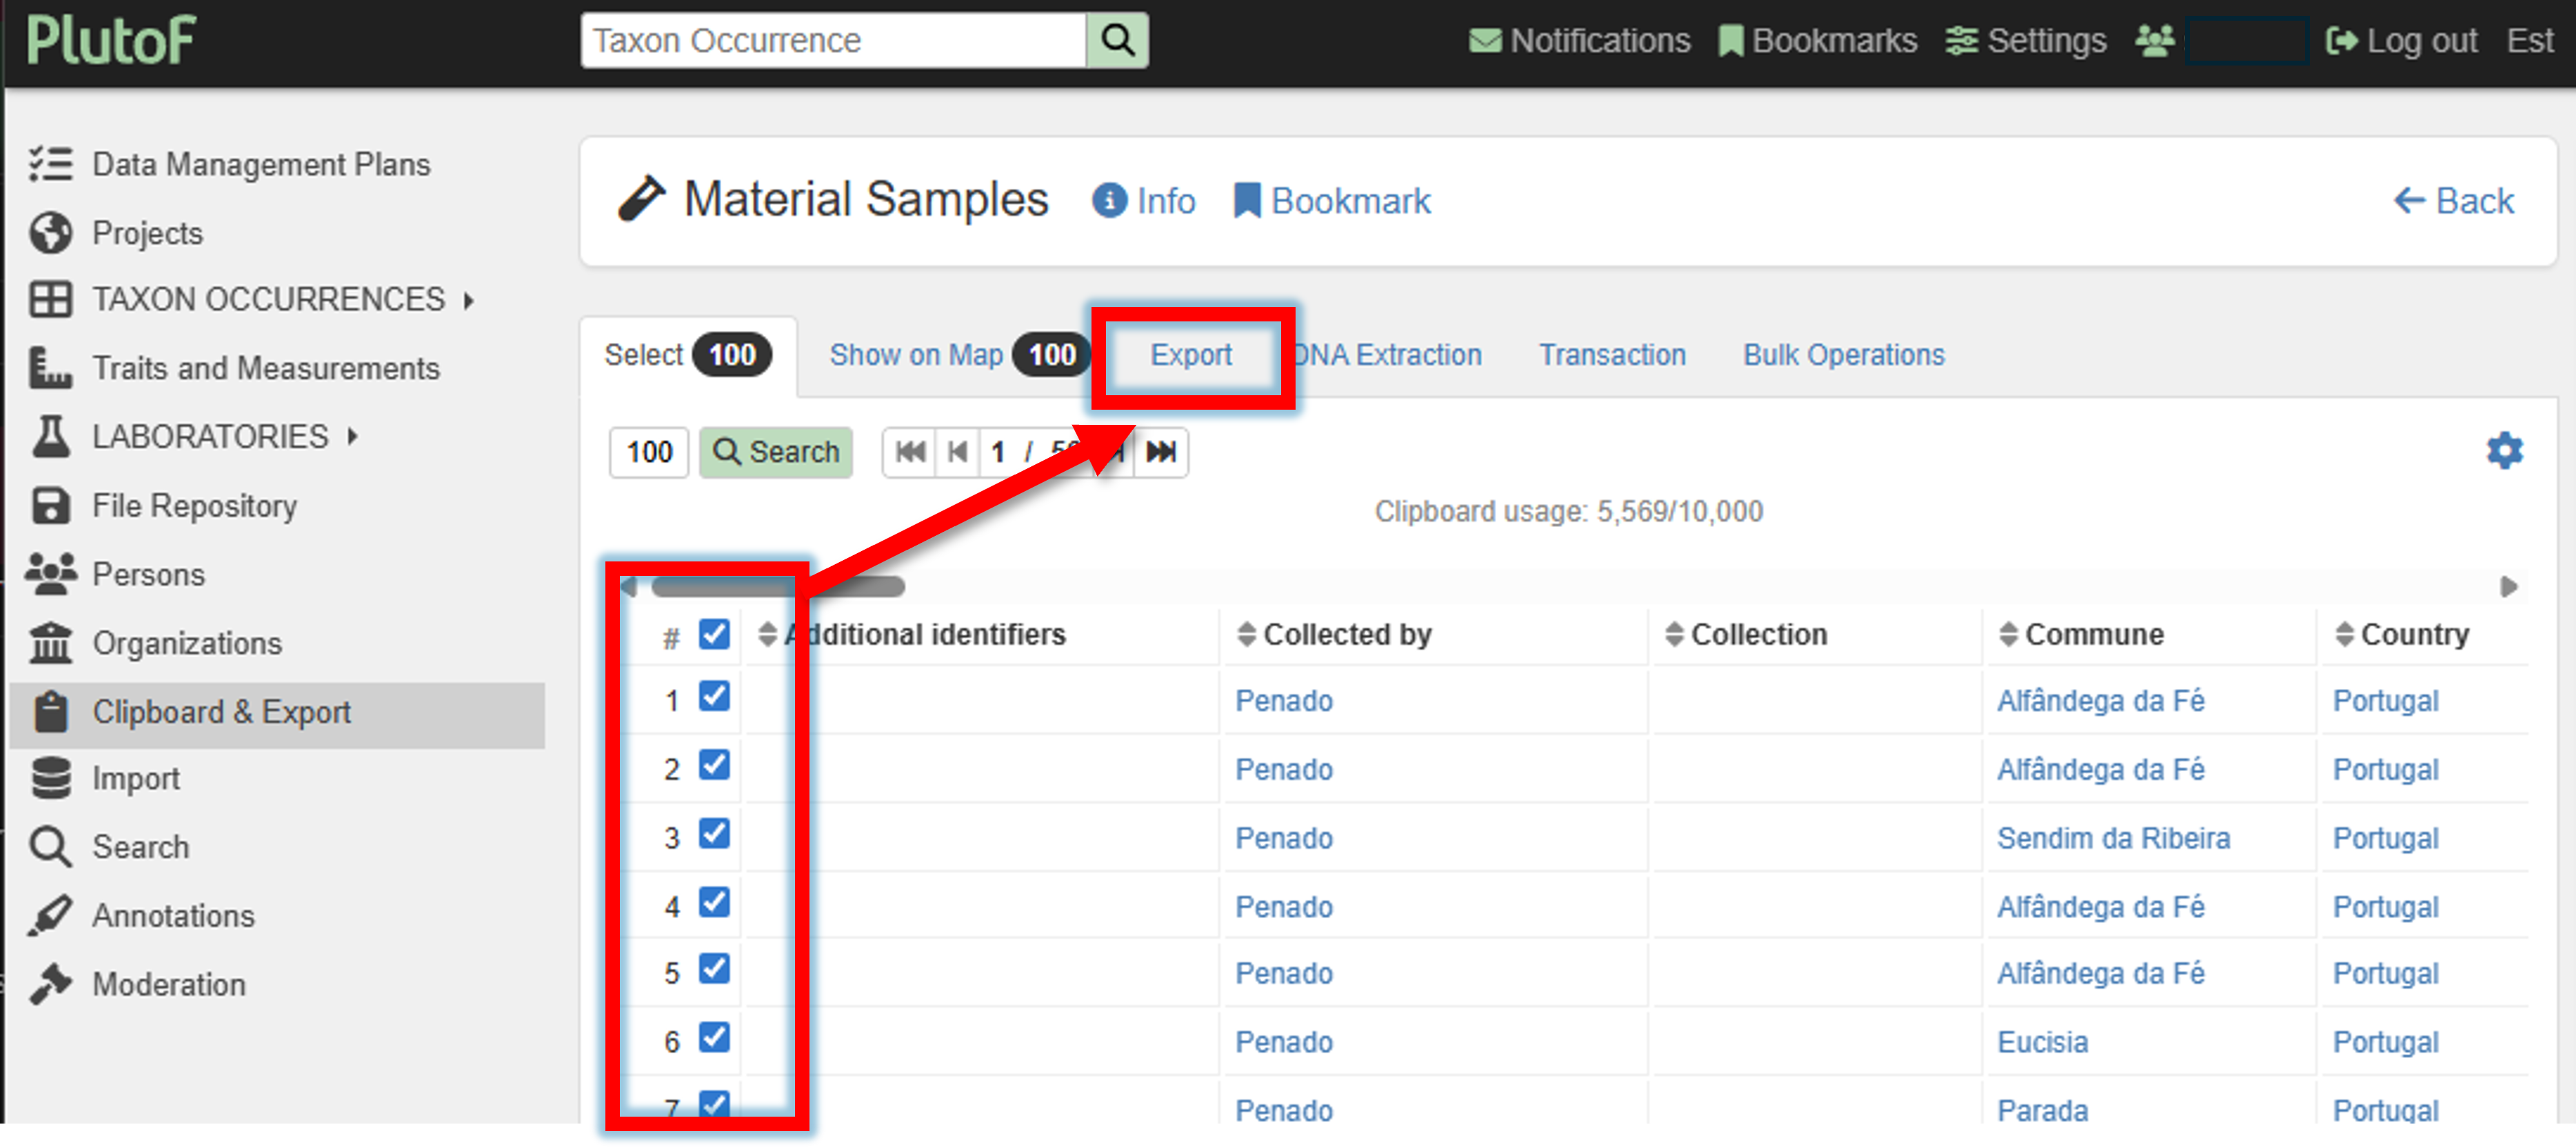
Go to the PlutoF workbench.
Search for the project.
Click on the “Material Samples” tab.
Click on the “Send all results to Clipboard” button.
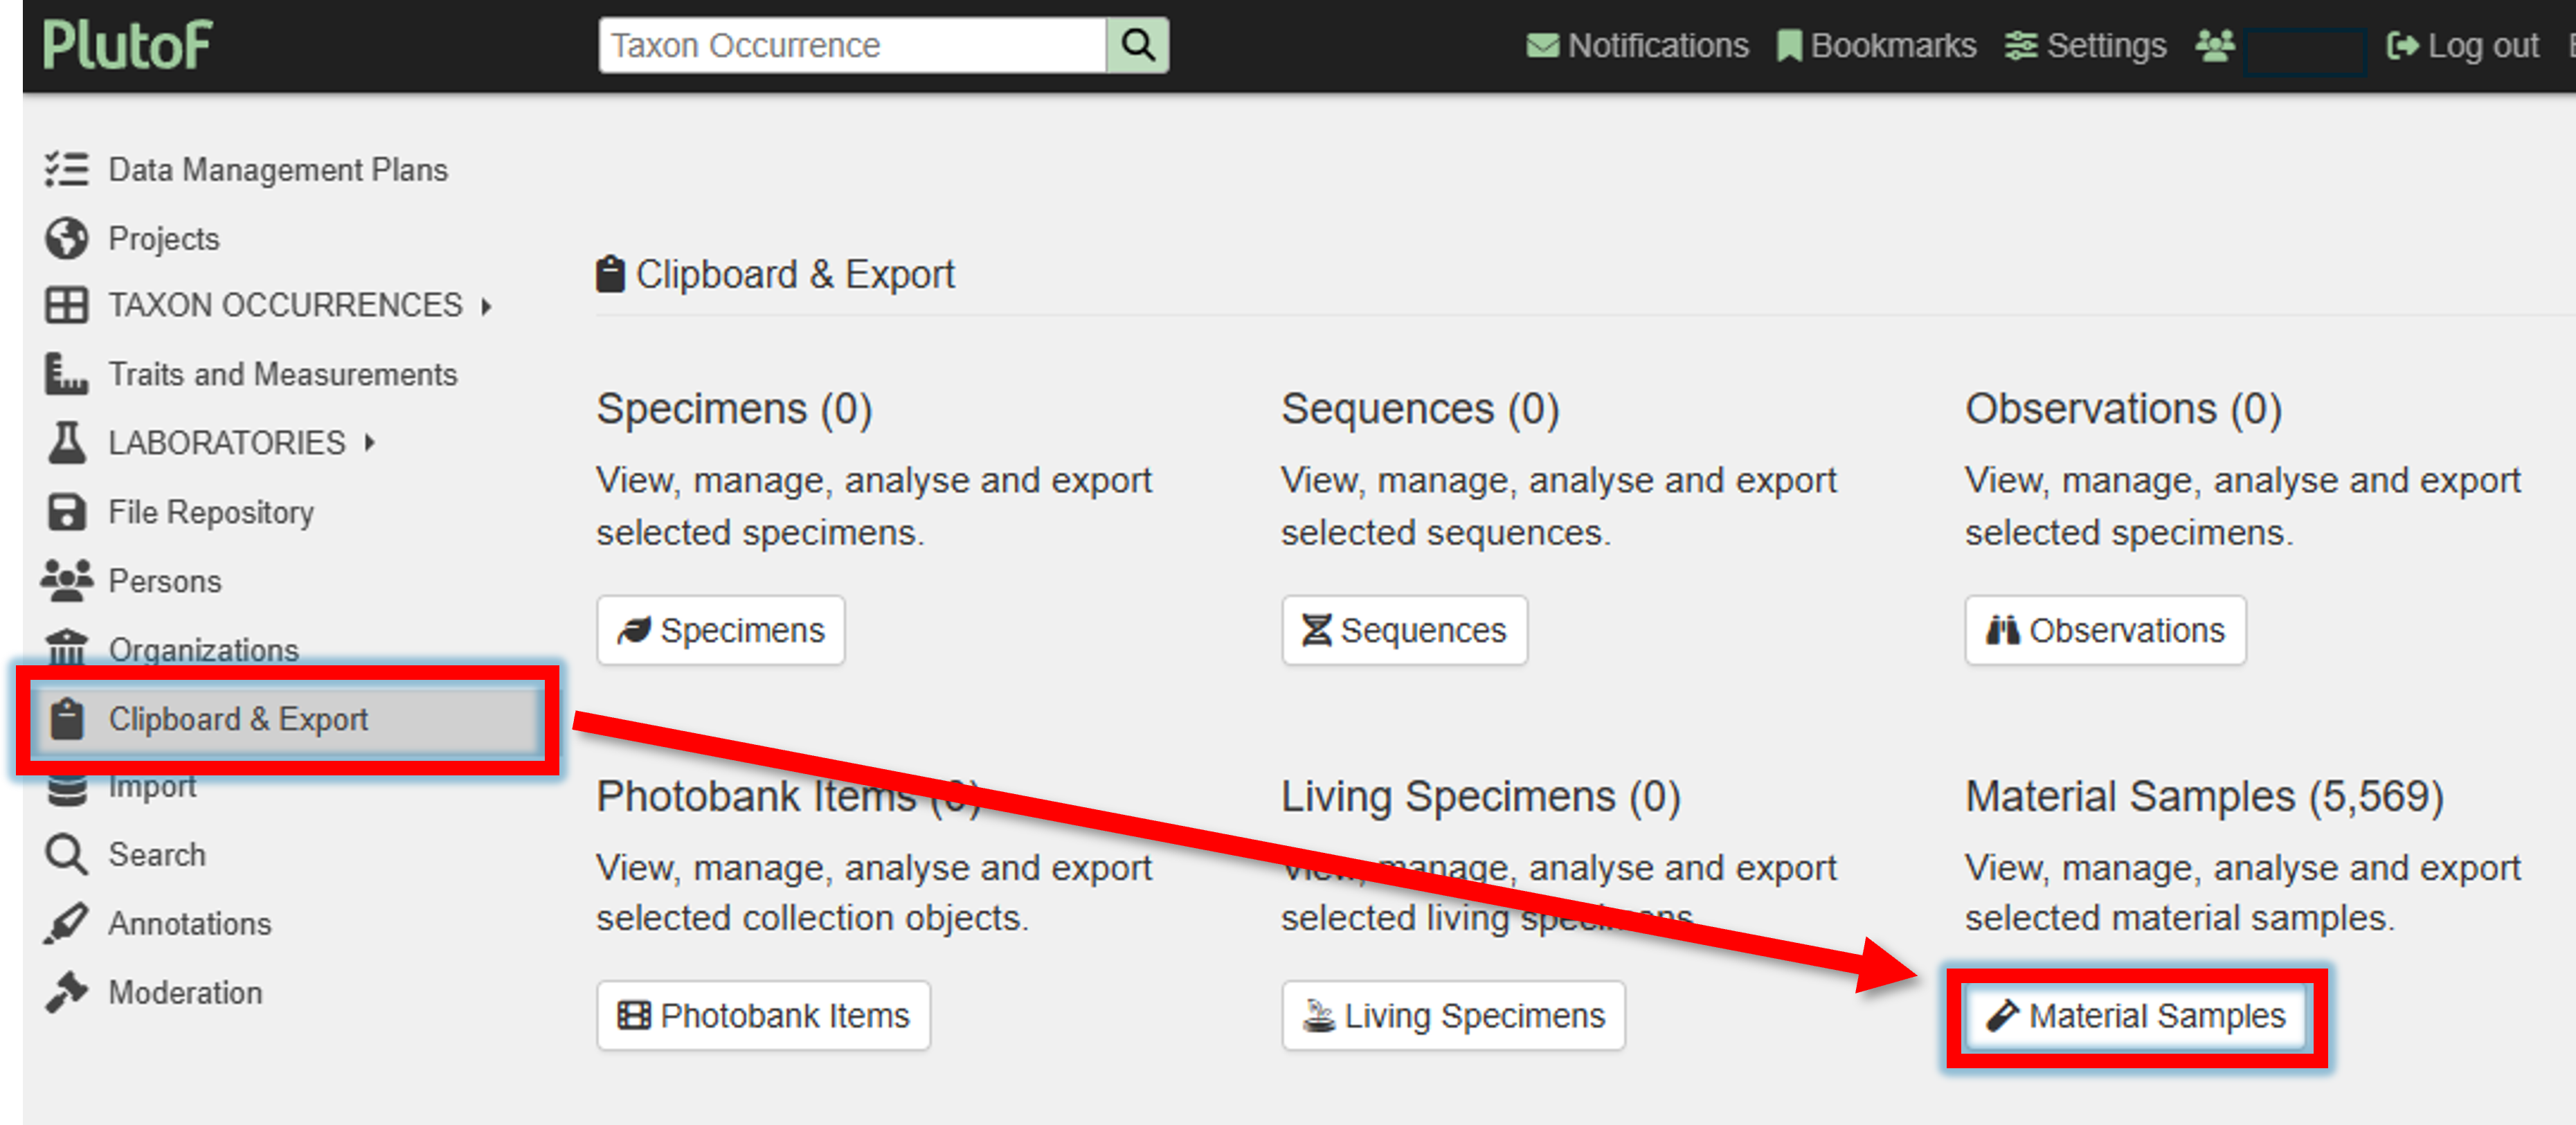
Go to Clipboard & Export panel –> and click on “Material Samples”.
Select all samples (or a subset of samples) and click on the “Export” button.
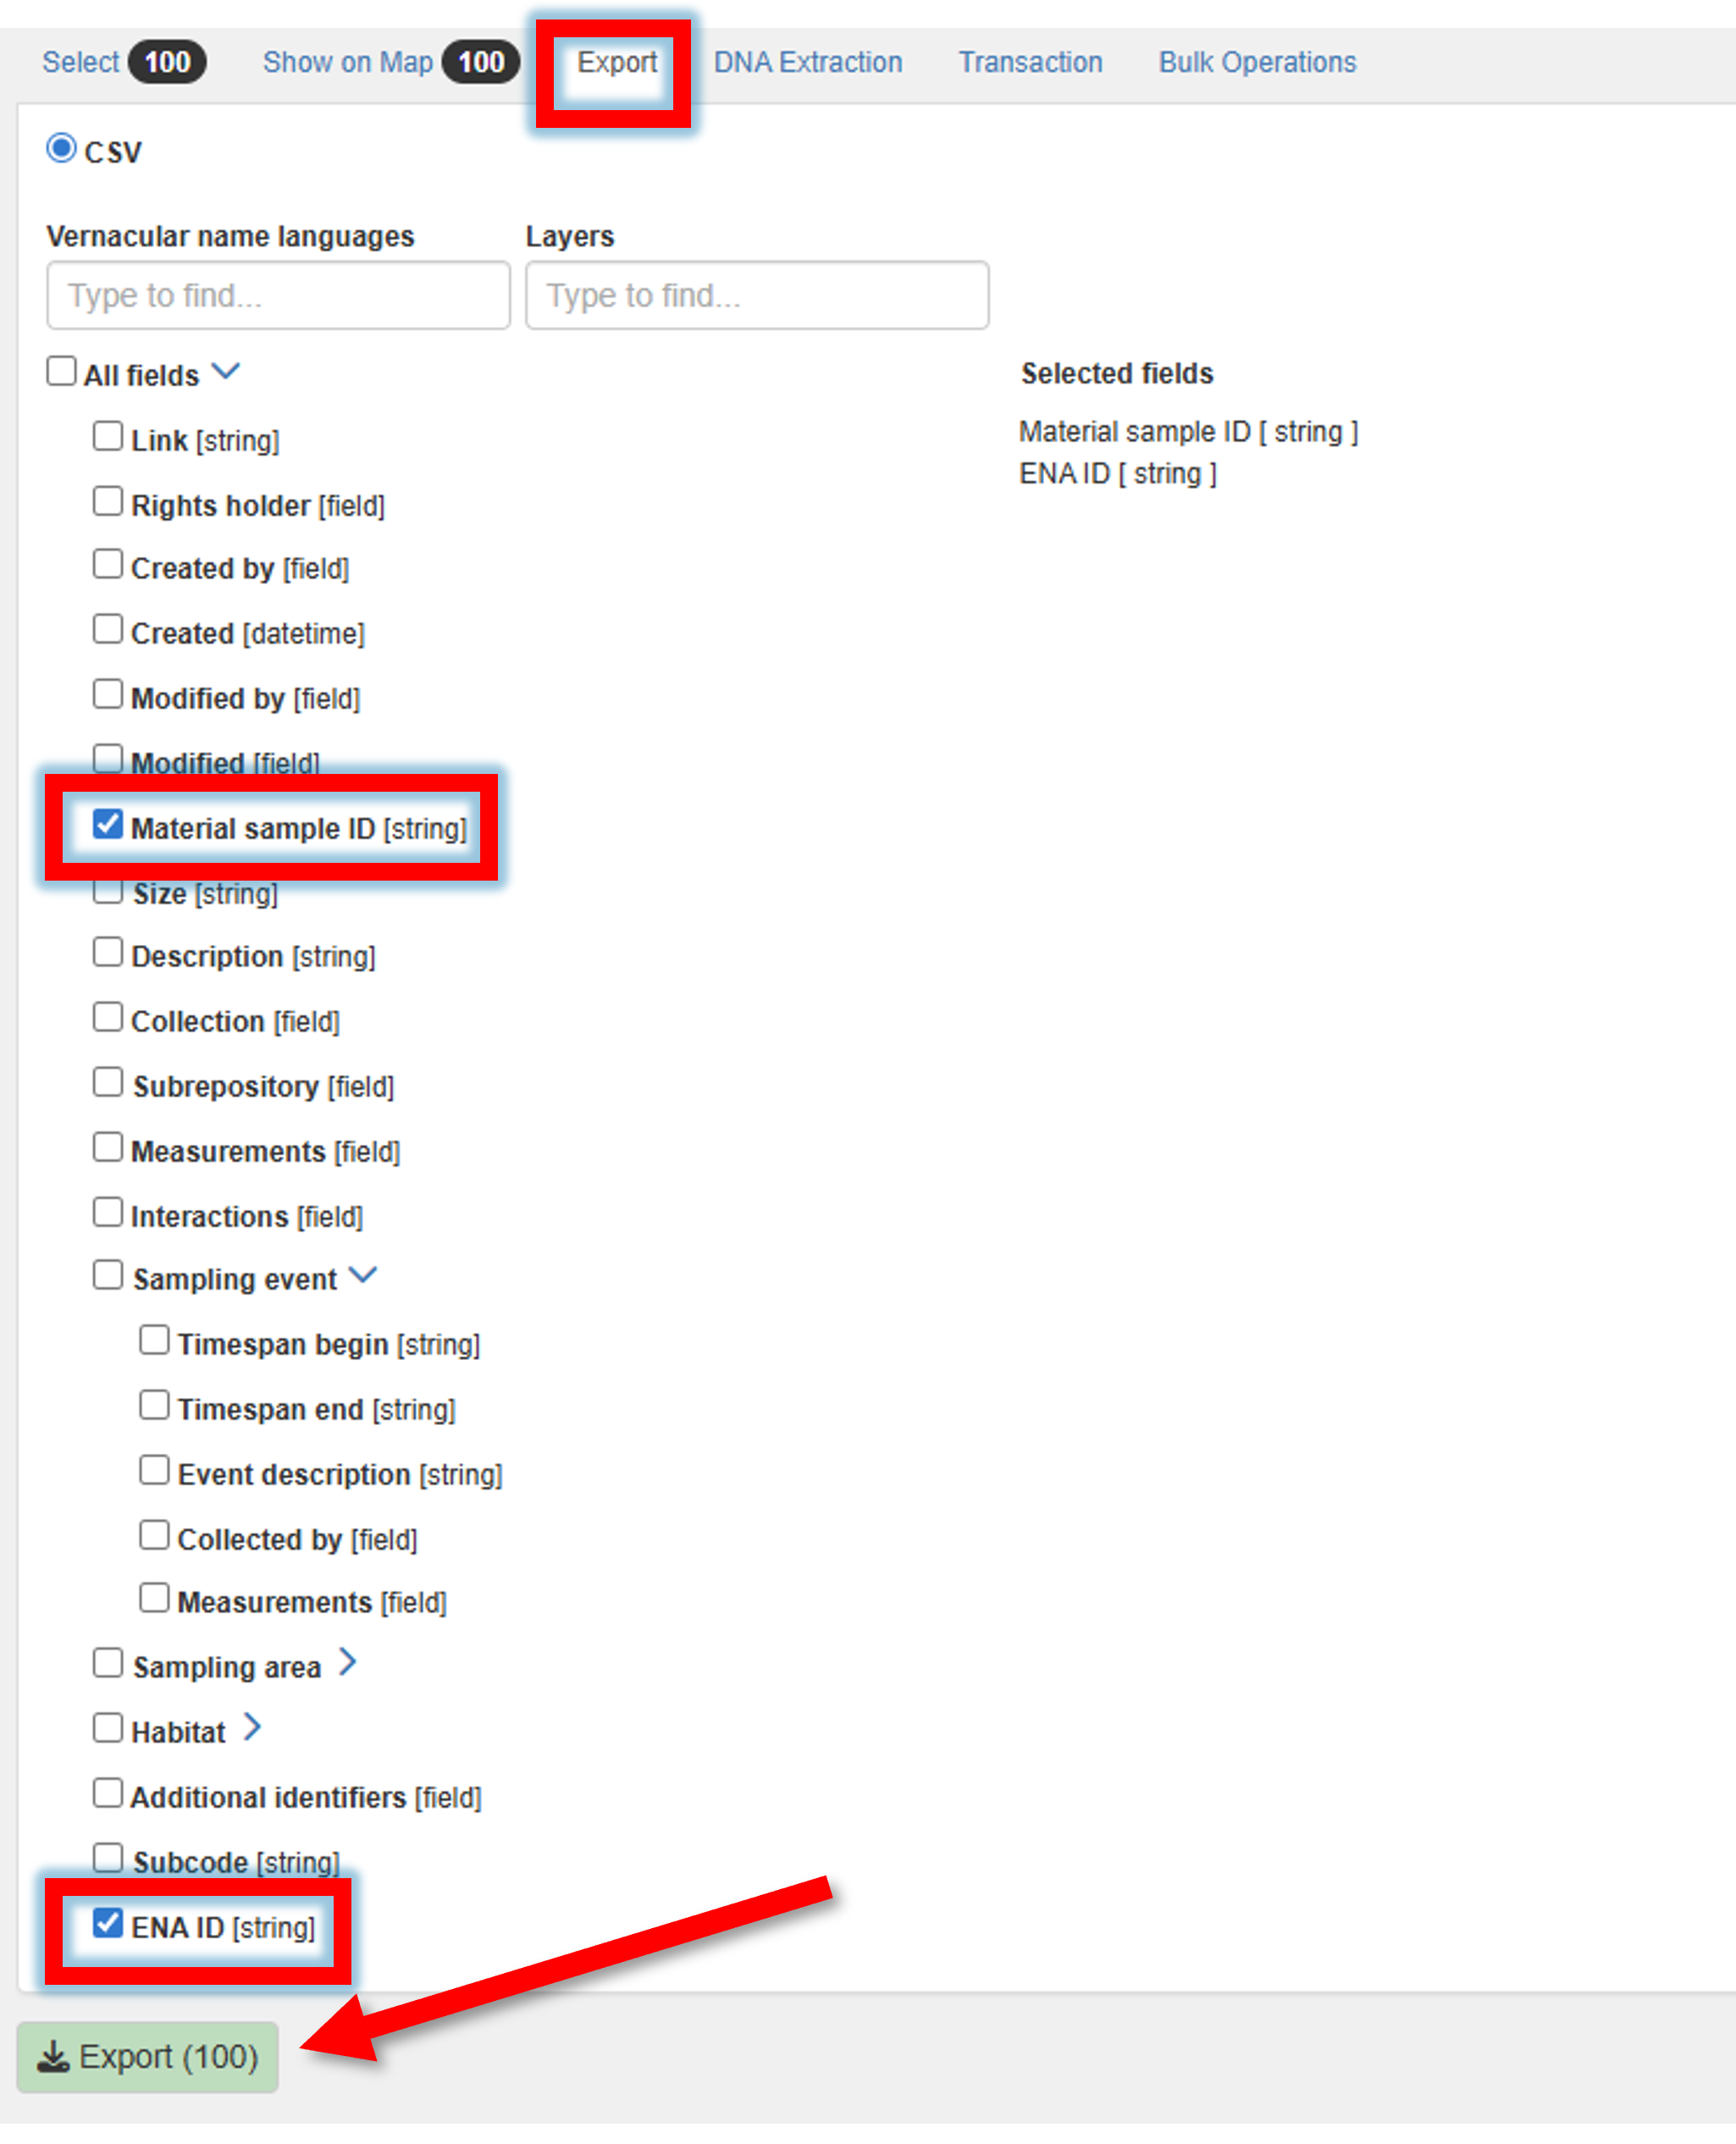
Select the “CSV” format, are required fields. Be sure to select Material Sample ID and “ENA ID” (this is BioSample ID), and click on the Export button.
If you export many samples, then this may take a while. You will receive an email when the export is complete.

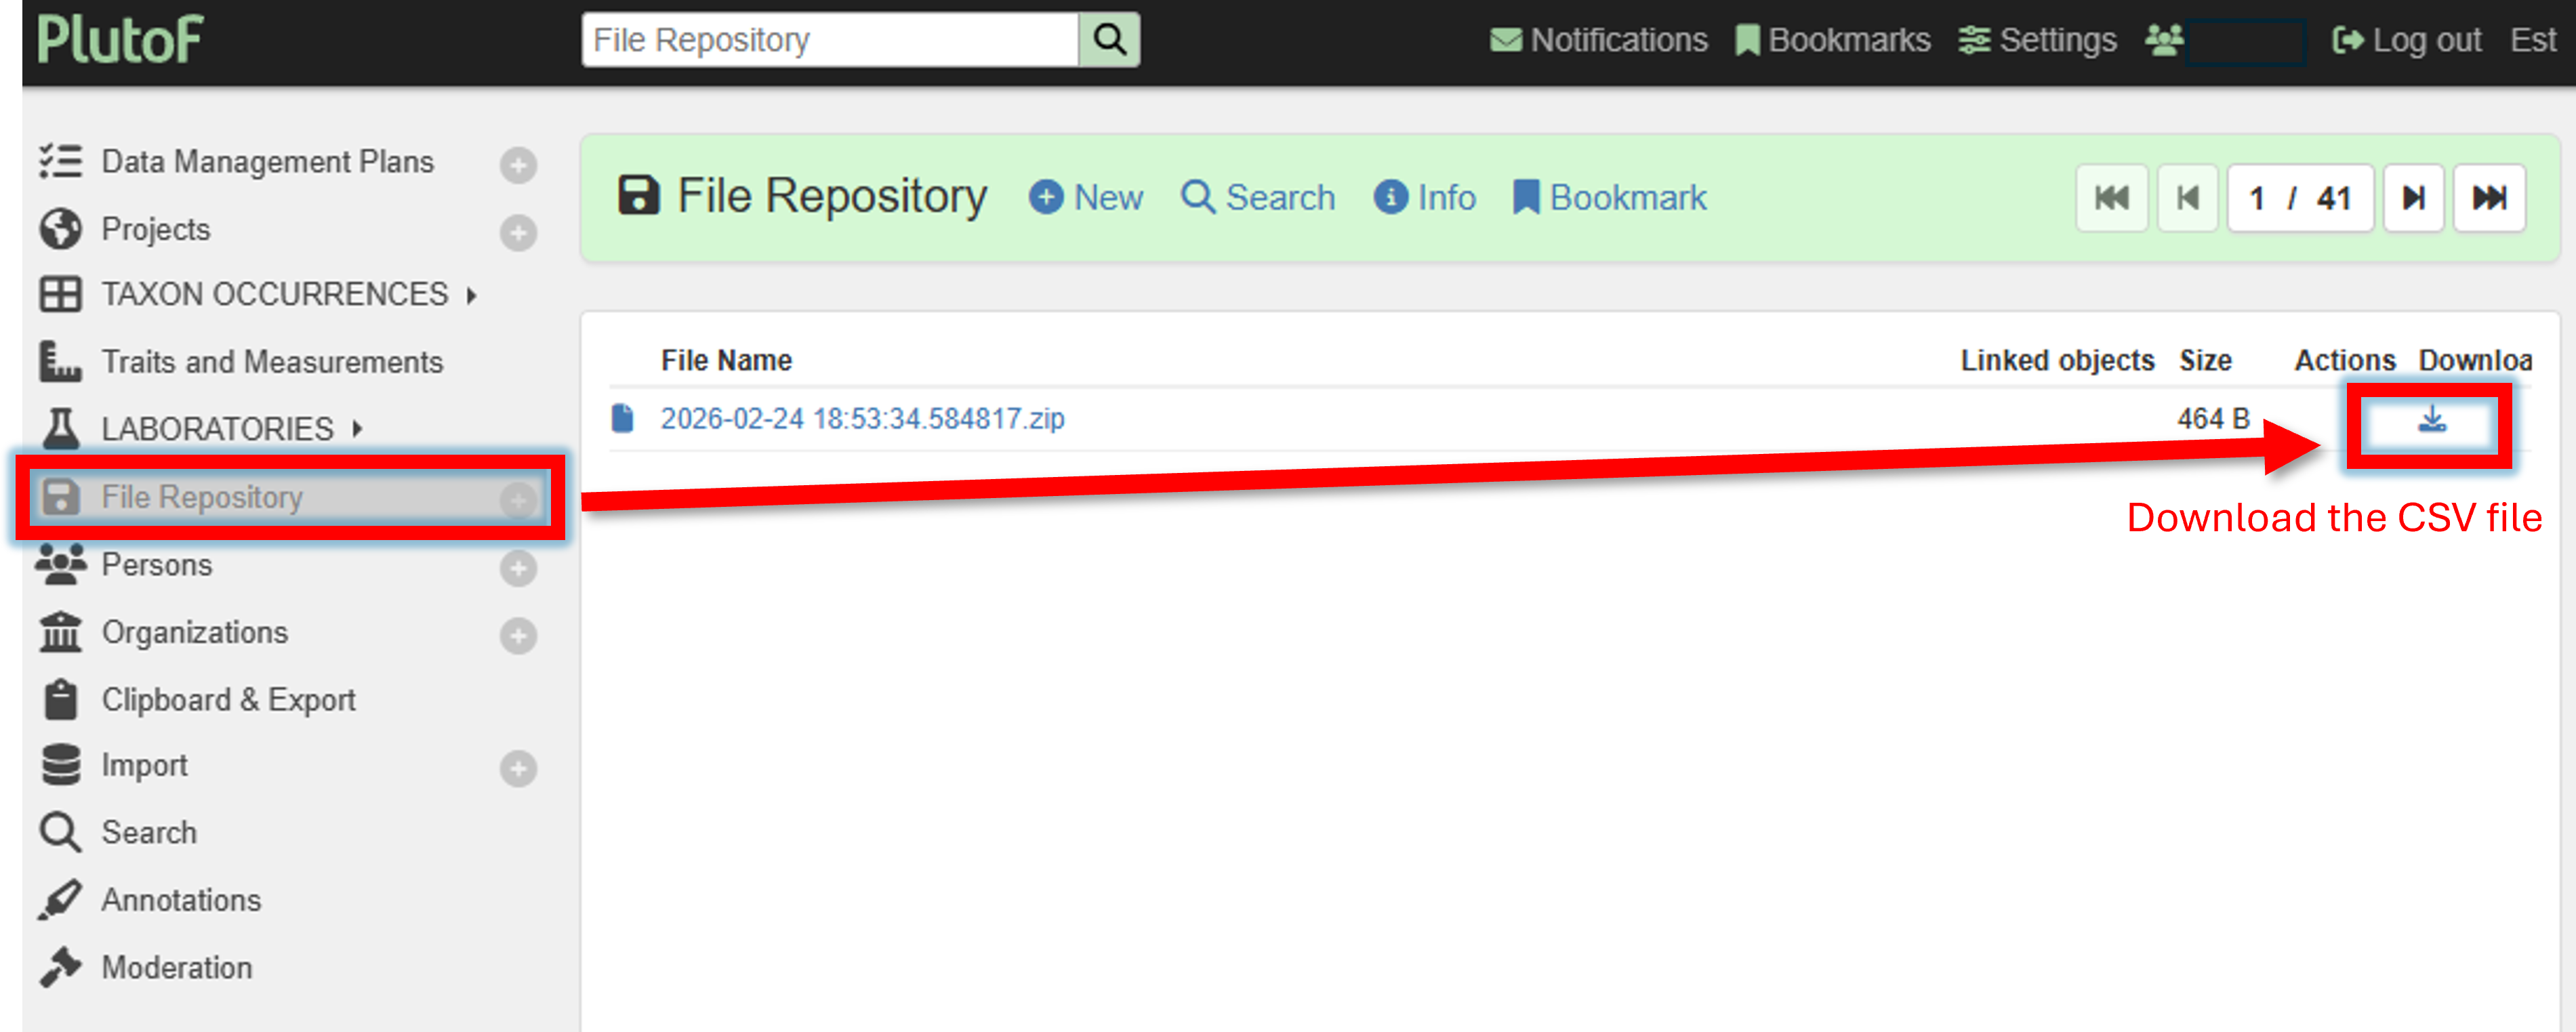
When ready, the file can be downloaded from the File Repository panel.
Here, we selected to export only Material Sample ID and ENA ID, so the exported CSV looks like this:

These are the sample IDs (Material Sample IDs) and the BioSample IDs (ENA IDs) that can be used to link the raw sequence data to the samples (see below).
Further data sharing
See Data sharing section for instructions on how to submit raw sequencing data to ENA, upload representative sequences of ASVs/OTUs to PlutoF and GBIF.
![]()

![]()
![]()